Network Manager configuration
If your network has a DHCP server, the virtual machine will be assigned an IP address automatically and you can safely skip this guide.
This guide walks through using NMTUI (Network Manager Text User Interface) to assign a static IP to your Single Node VM.
Per your network defined configurations and boundaries
-
Before configuring the virtual machine's network, you need to know the MAC address of the ethernet the machine is running.
-
Run
nmcliin the console to determine which network the virtual machine is using. Make a note of this. -
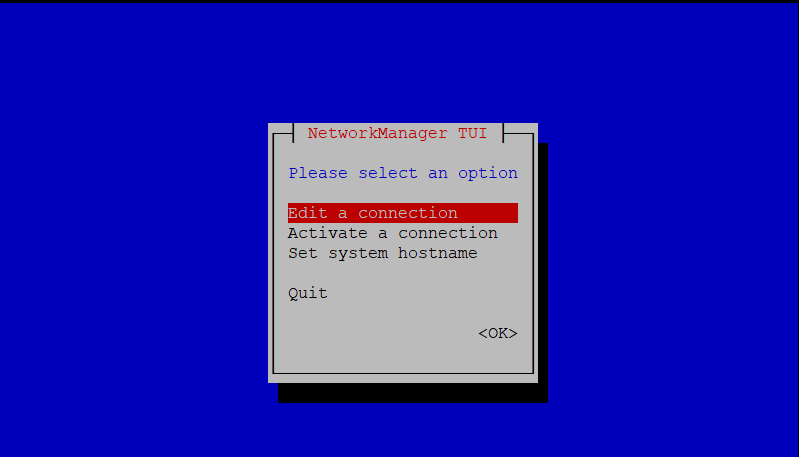
Once you know which network to edit, run
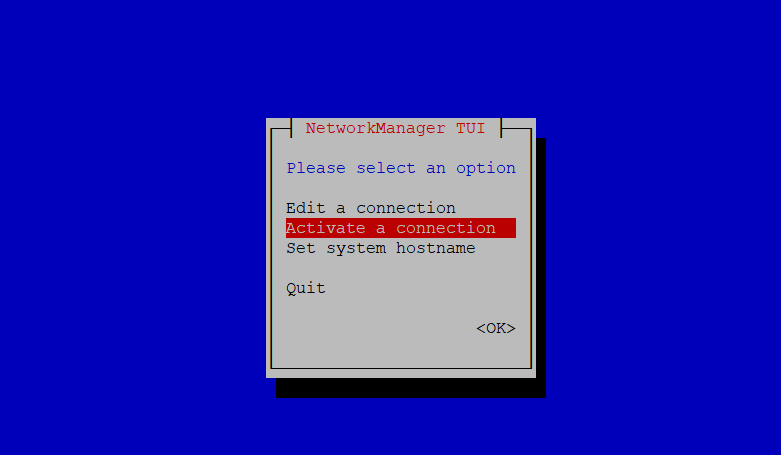
nmtuito launch the Network Manager and select Edit a connection.
- Based on your configuration requirements:
- Either Add network adapter or Edit connection.
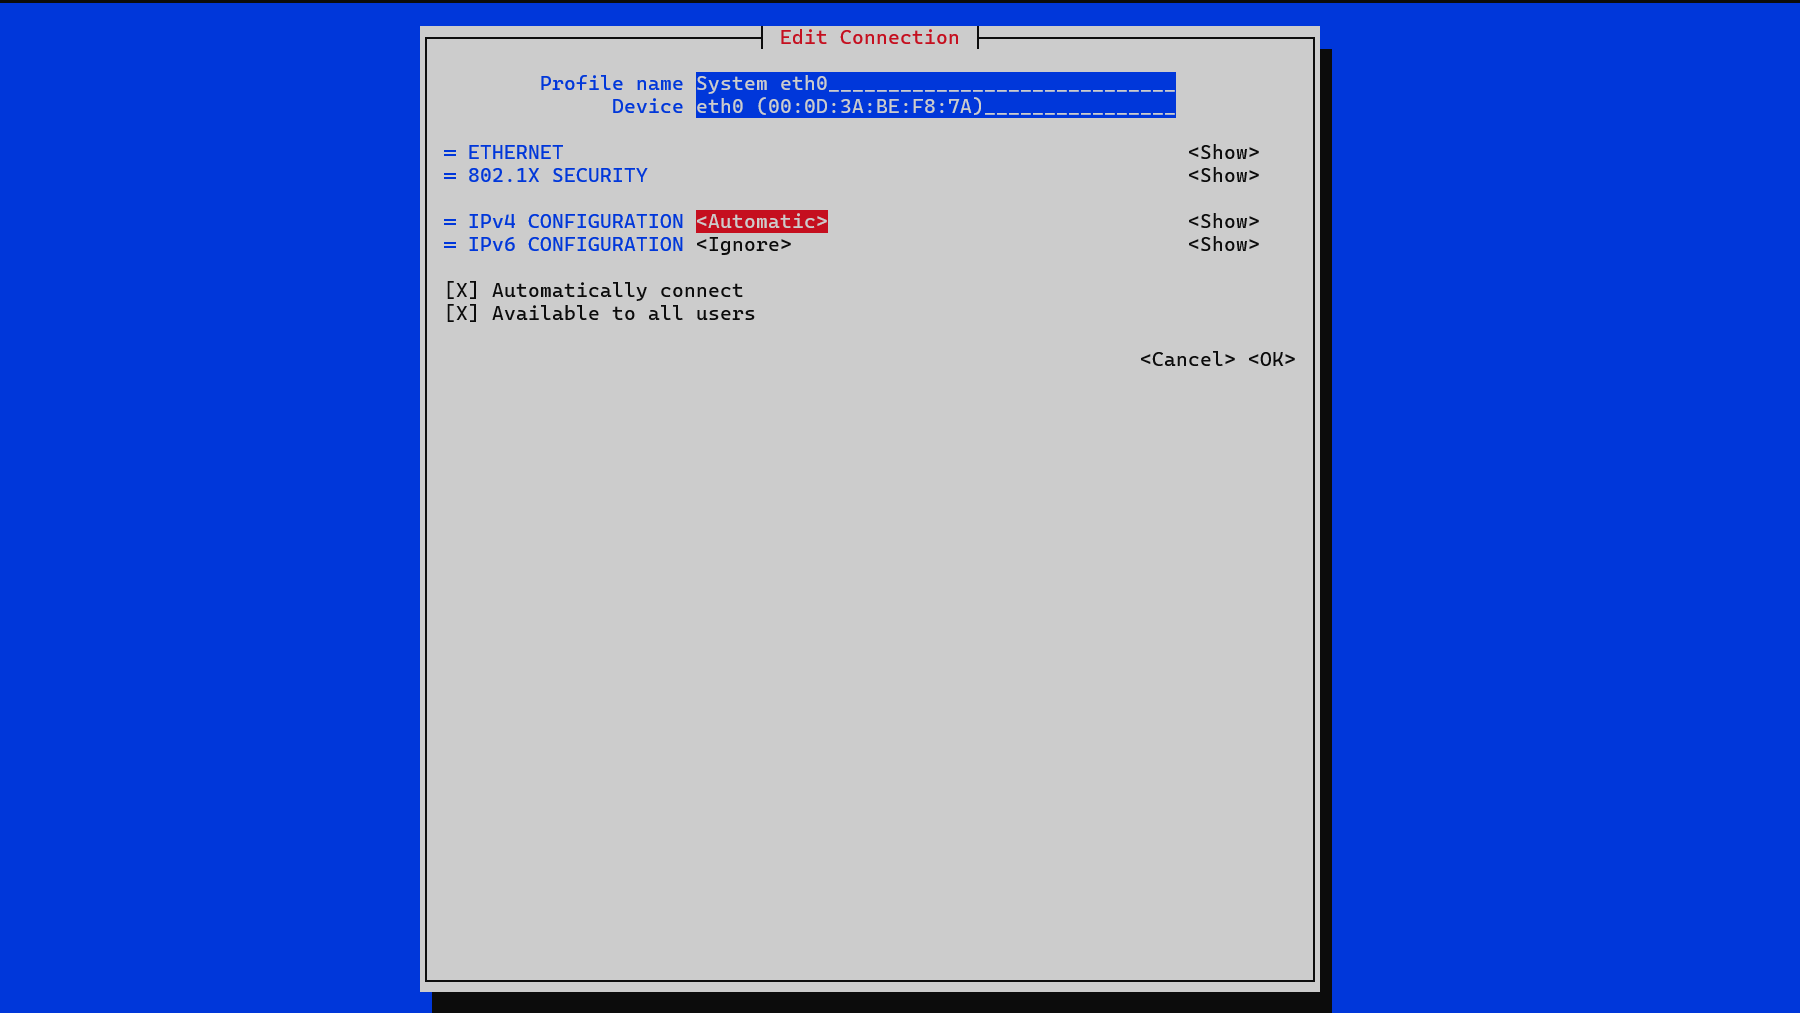
- In our example we edit the connection the virtual machine is using.

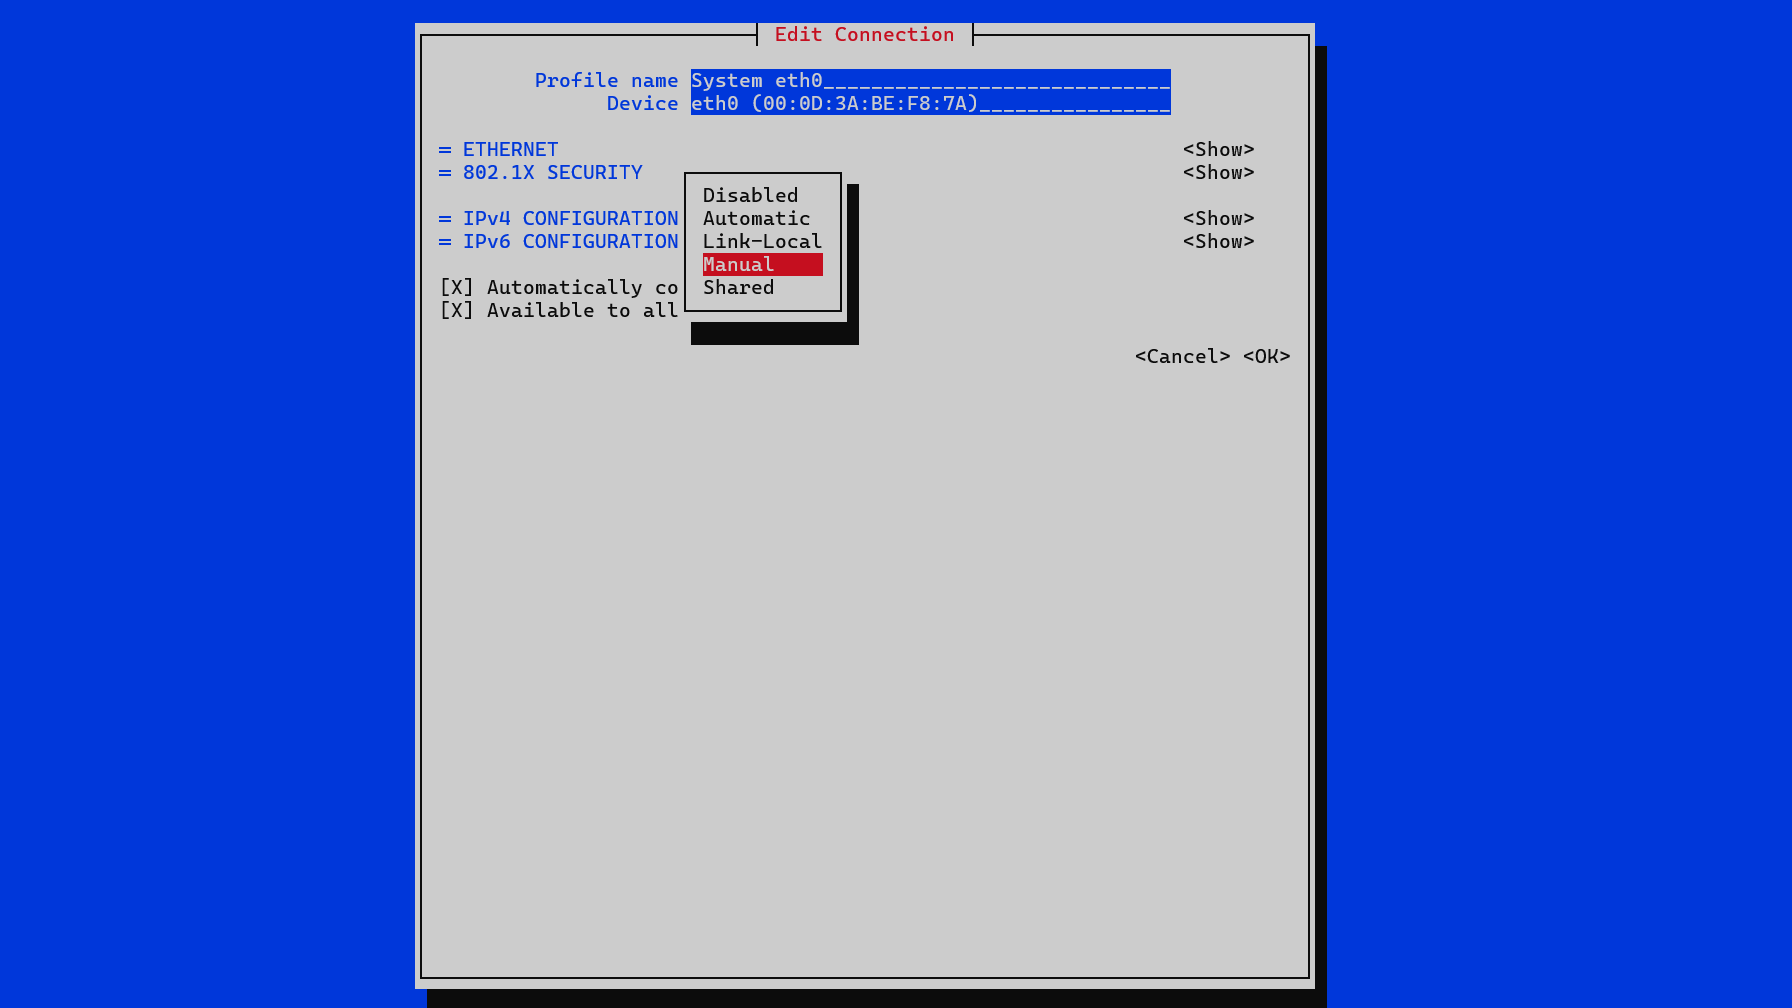
- Select the option next to
IPv4 CONFIGURATION; in our example, it is Automatic. Set this to Manual using the dropdown menu that appears.
-
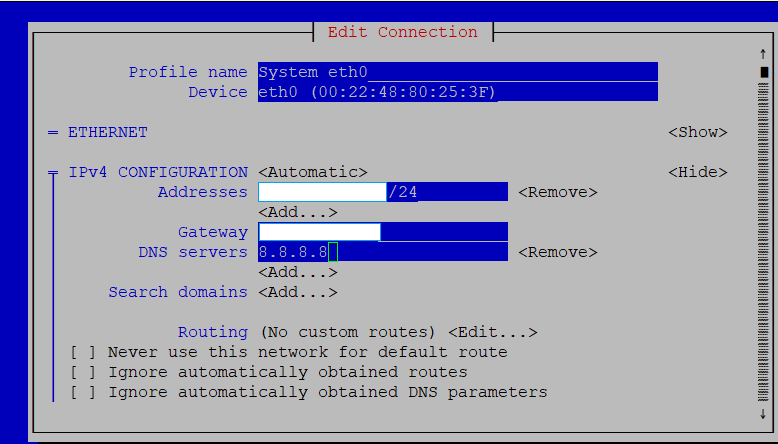
Select Show for the IPv4 configuration. This will provide options to edit IP addresses, gateway and DNS servers.
-
Enter the required information, then scroll to the bottom and click OK.
- Navigate back to the Network Manager main screen, then select Activate a connection and ensure your connection is set to Activated.

- Exit the Network Manager and run the following command:
sudo systemctl restart NetworkManager
- Continue following the appropriate Single Node VM deployment page.