Okta Authorization Server
Set up a custom Okta authorization server with the claims, roles, and access policies required by Halo. This is a prerequisite for both Halo Portal SSO and Halo API Bearer Authentication.
Prerequisites
- An Okta organization with admin access
- Network access from your Halo deployment to Okta
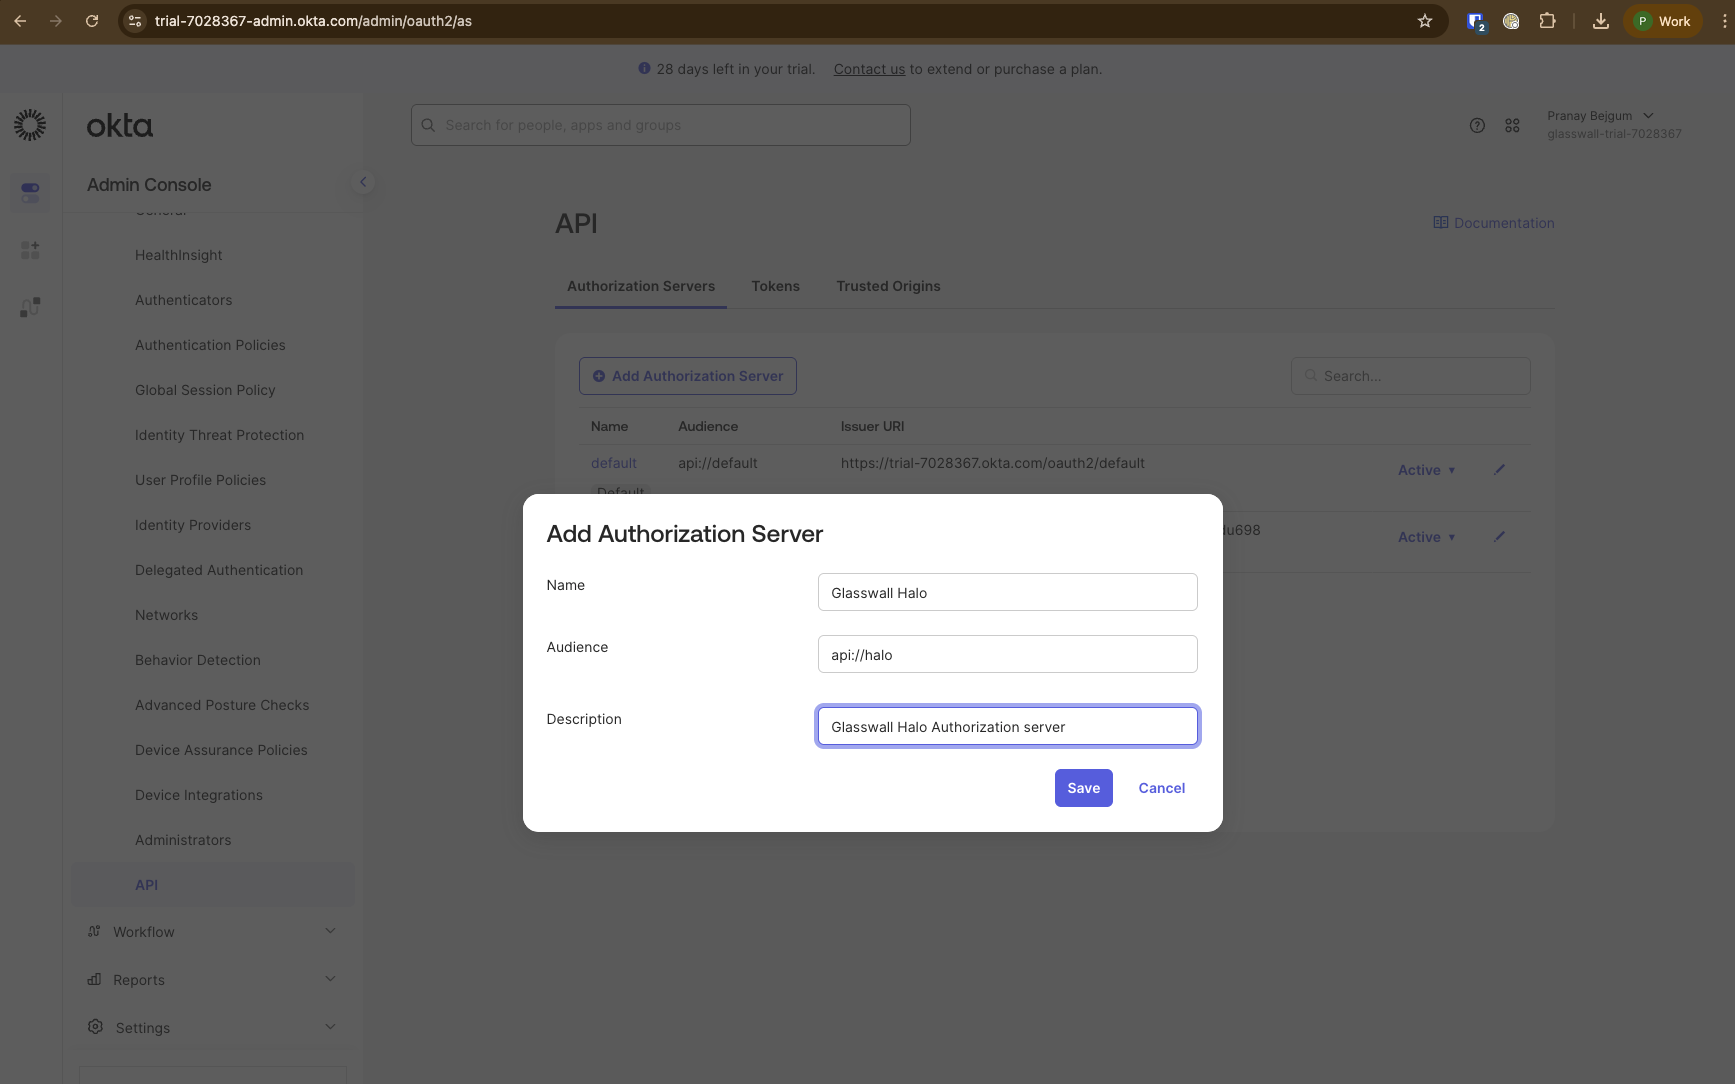
Create authorization server
- Navigate to
Security->APIand create a new Authorization server.-
Give an appropriate name. e.g.
Glasswall Halo -
Enter a common audience value that will be shared across all Halo clients (Portal and API). e.g.
api://halo -
Give an appropriate description. e.g.
Glasswall Halo Authorization server -
Once saved, make a note of the
Issuer Metadata URI. Remove/.well-known/oauth-authorization-serverfrom the end of the URI. e.g.export ORIGINAL_ISSUER_URI=https://your-org.okta.com/oauth2/aus1234567890abcdef/.well-known/oauth-authorization-server
export OKTA_ISSUER_URI=https://your-org.okta.com/oauth2/aus1234567890abcdef
export VALID_AUDIENCE="api://halo"
-
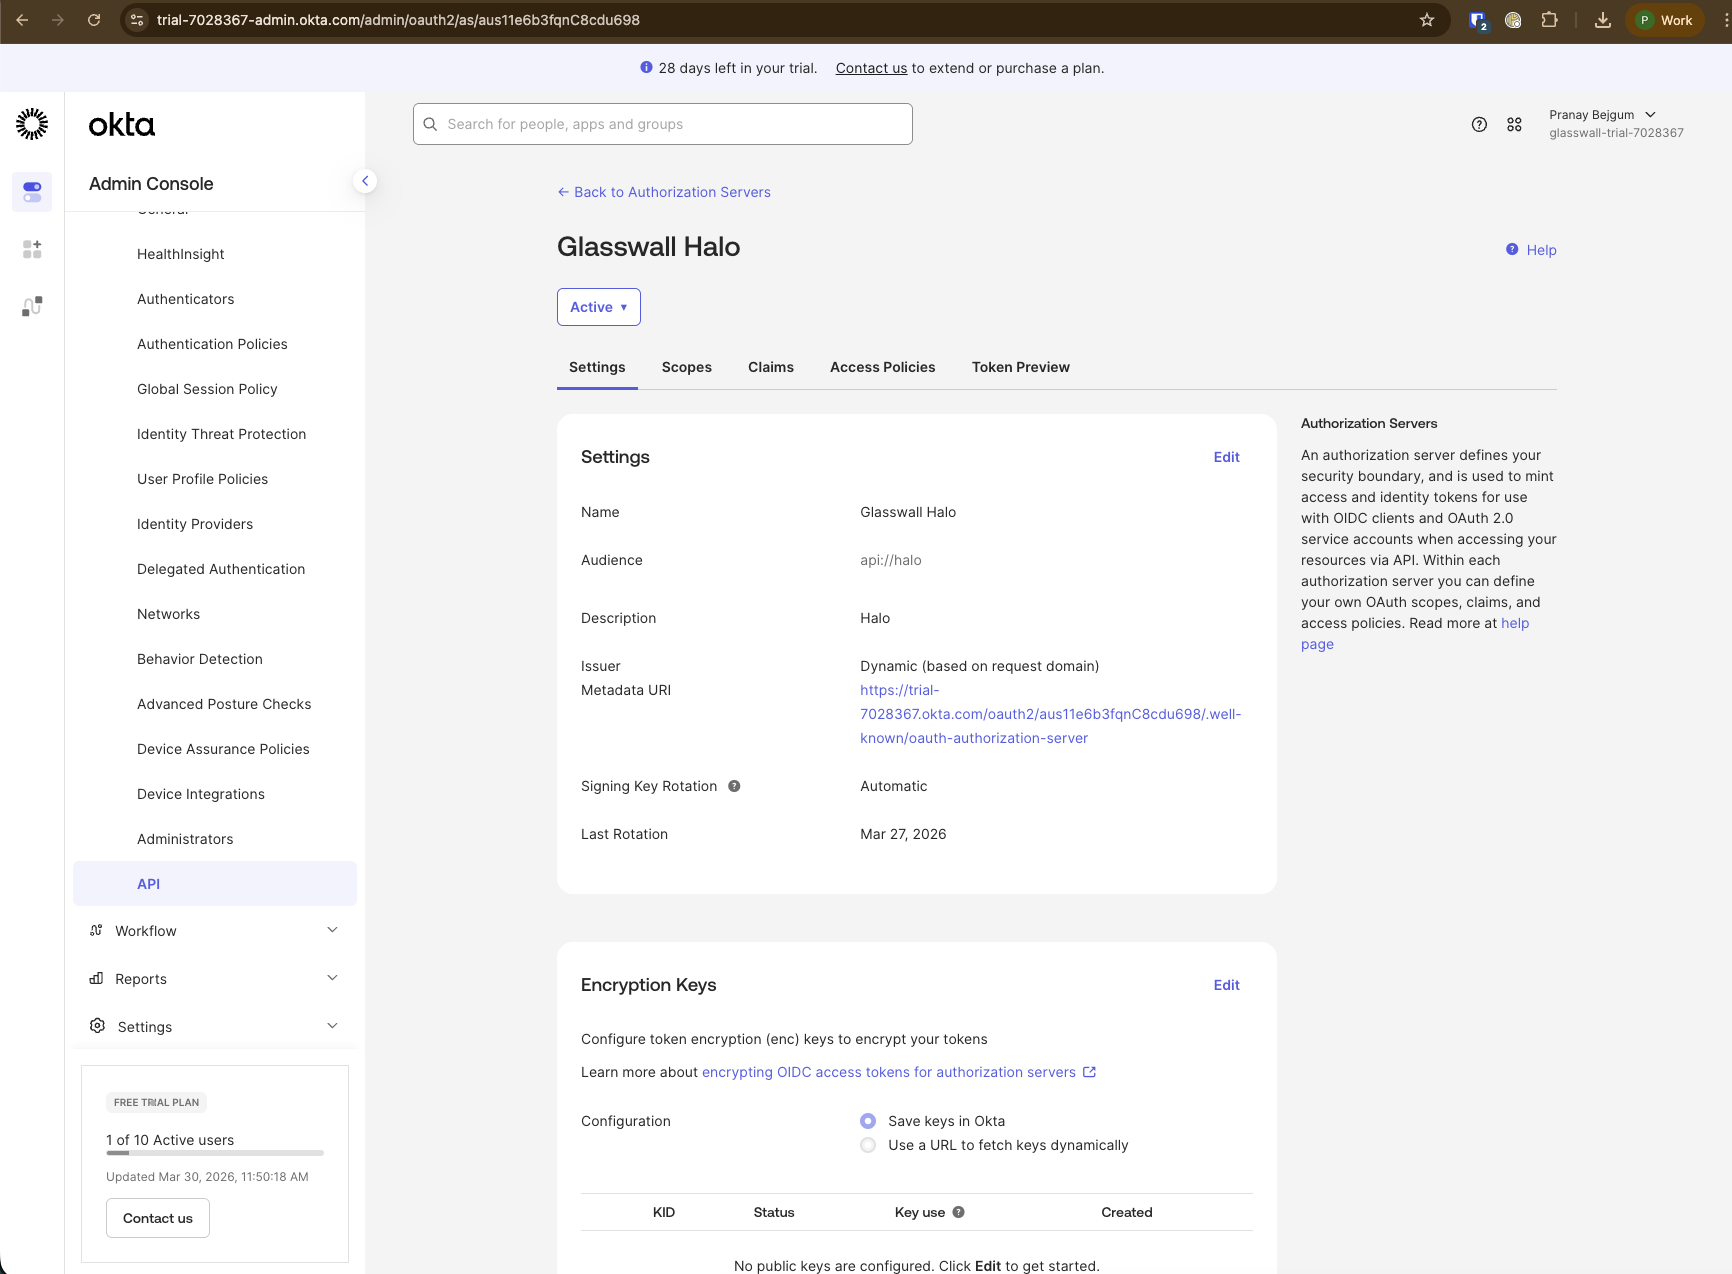
Note: The audience
api://halois shared across all Halo clients. Both Portal SSO and API Bearer authentication validate tokens against this audience. This allows a single authorization server to serve both use cases.
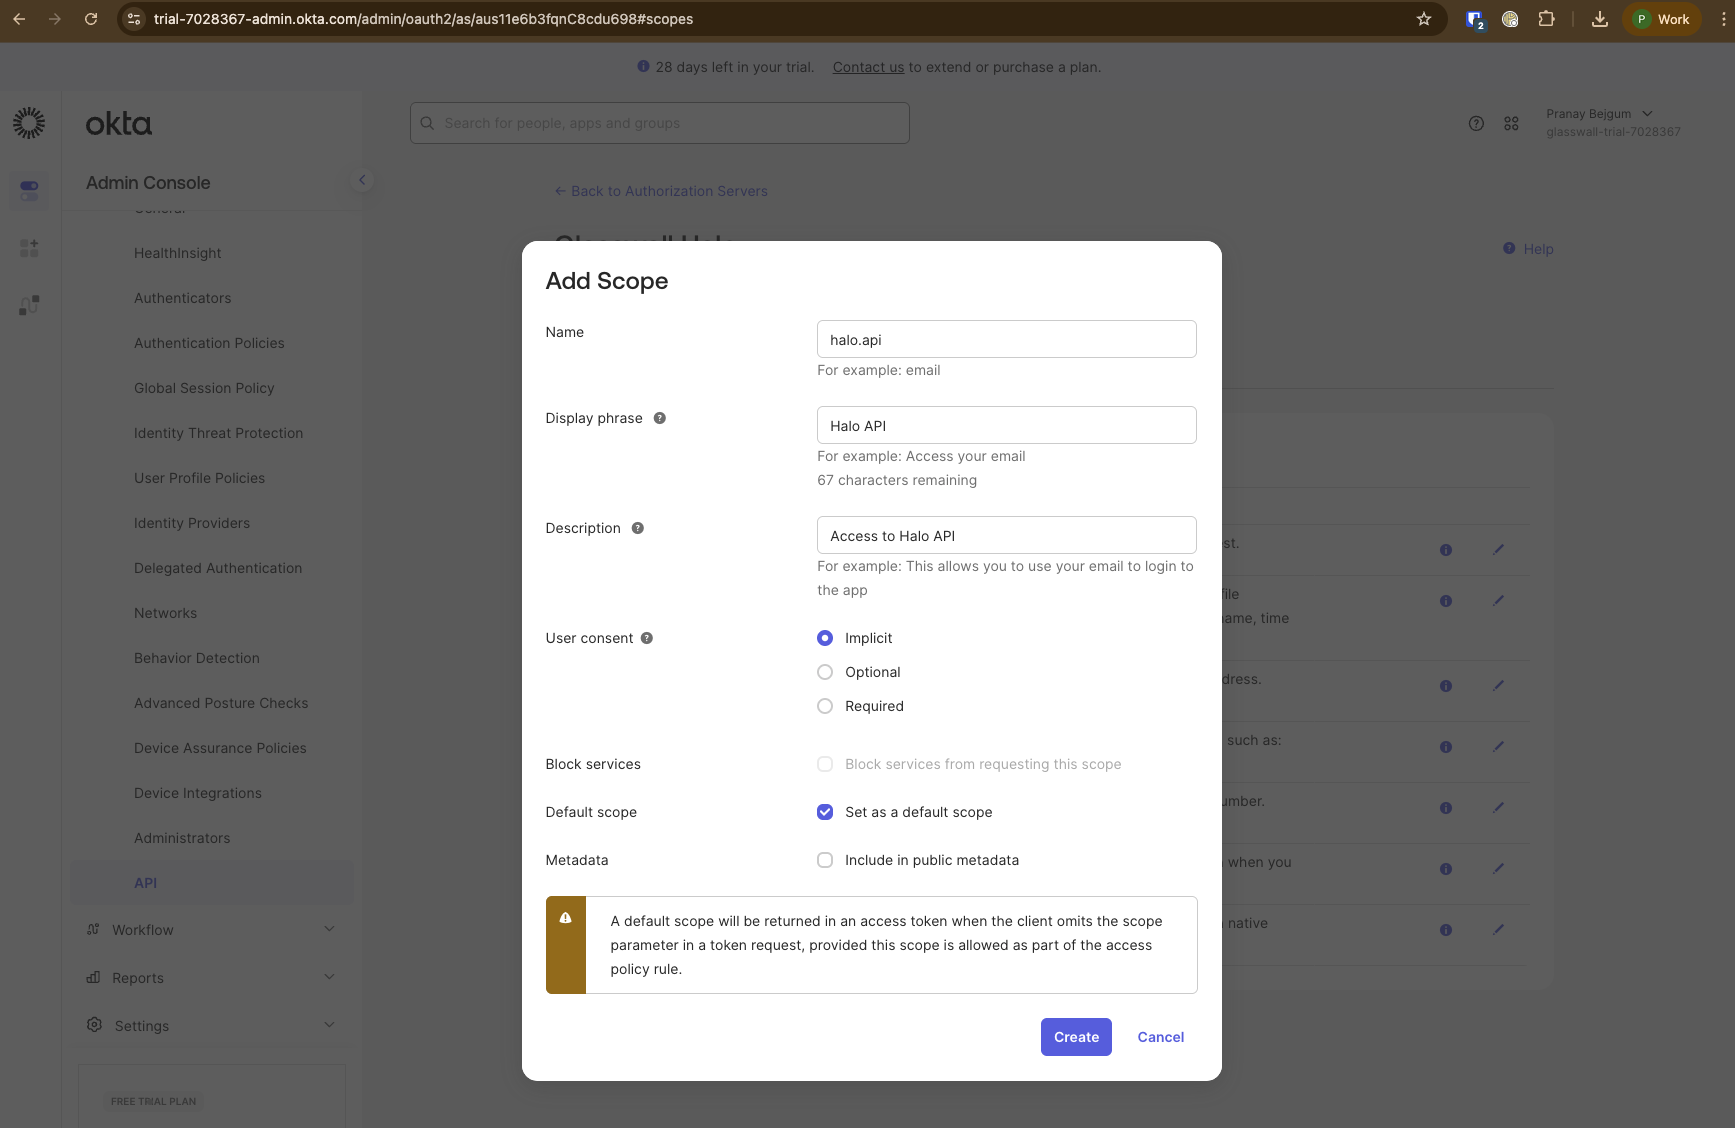
Add custom scope for Halo API access
- Navigate to the
Scopestab on the authorization server and add a new scope:- Name:
halo.api - Display Phrase: Halo API
- Description:
Access to Halo API - Check
Set as a default scope
- Name:
Note: The OIDC scopes (e.g.
openid,profile,
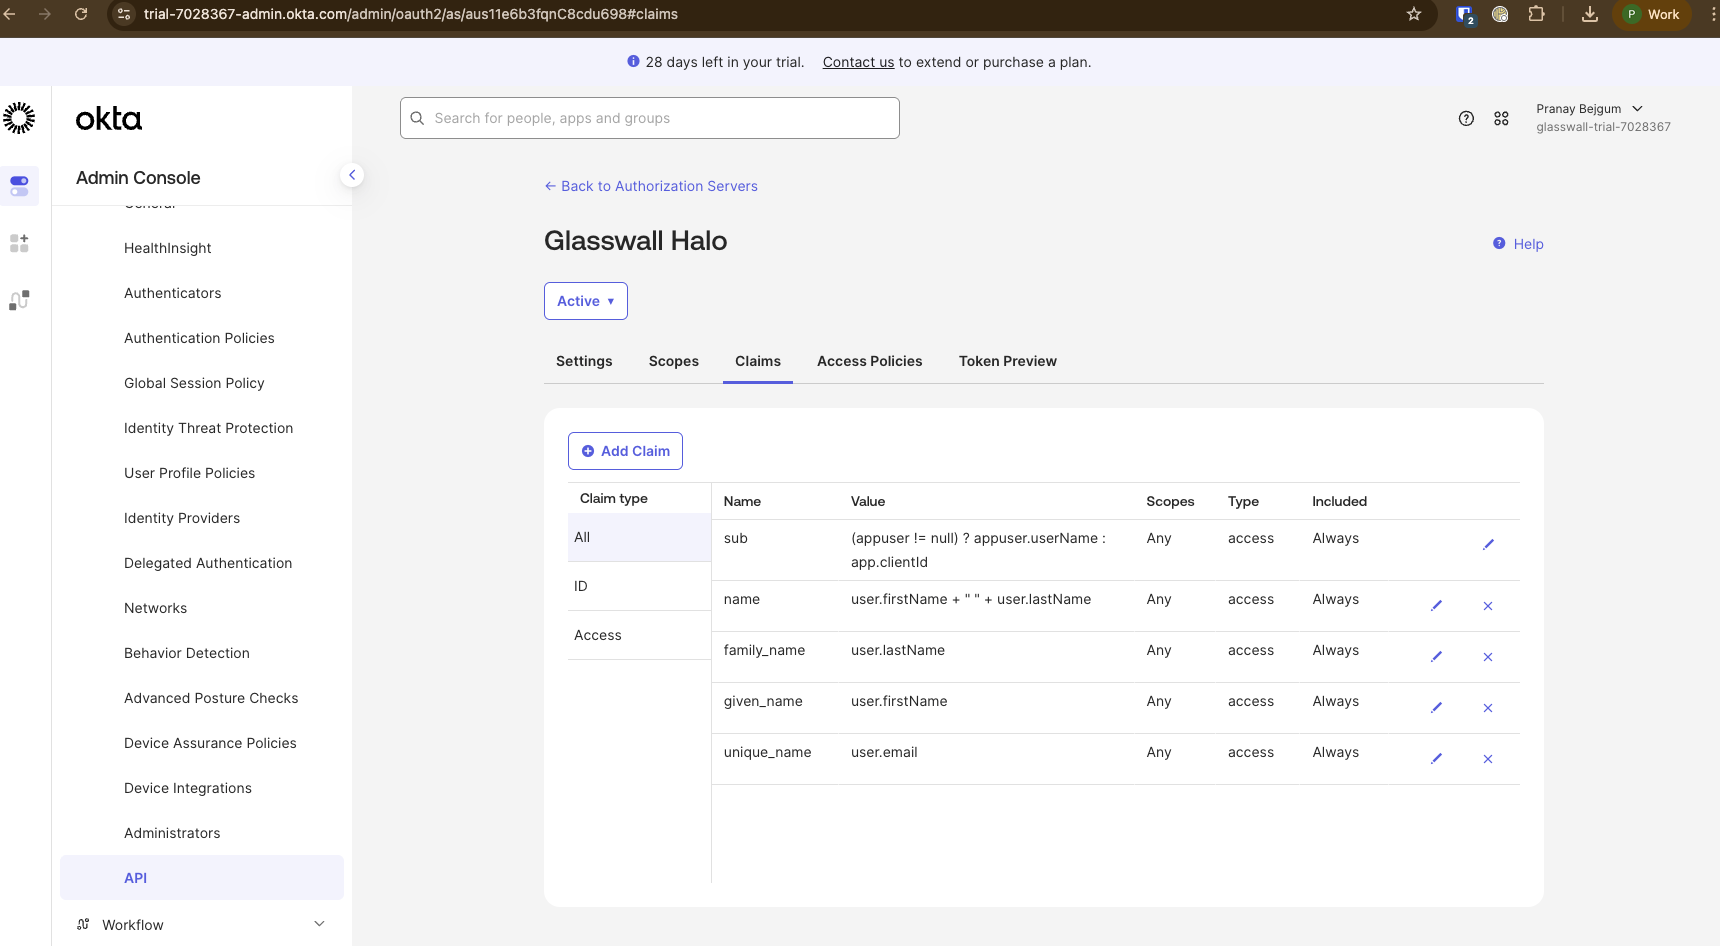
Set up claims
-
Configure the claims needed by Halo services. Navigate to the
Claimstab on the authorization server.- Full name:
- Name:
name - Include in token type:
Access Token - Value type:
Expression - Value:
user.firstName + " " + user.lastName - Include in:
Any scope
- Name:
- Family name:
- Name:
family_name - Include in token type:
Access Token - Value type:
Expression - Value:
user.lastName - Include in:
Any scope
- Name:
- Given name:
- Name:
given_name - Include in token type:
Access Token - Value type:
Expression - Value:
user.firstName - Include in:
Any scope
- Name:
- Email ID:
- Name:
unique_name - Include in token type:
Access Token - Value type:
Expression - Value:
user.email - Include in:
Any scope
- Name:
- Full name:
Define roles
Note: Halo uses two separate role claims:
roles: used by the Portal (via Portal-Access) to control UI accessrole: used by the API-Access service for endpoint authorizationIf the role claims are not configured, the Portal defaults to a read-only role and the API defaults to the
Userrole. See Portal Roles to Action Mapping and API Roles to Action Mapping for details on what each role can access.
- Halo recognizes two role values:
UserandAdmin(case-insensitive). Okta doesn't have a native way of defining roles in Authorization servers. Role claims need to be added to pass the user/client roles in the access token.
Portal SSO roles (roles claim)
This claim is used by the Portal to determine which pages and features are available to the user. We recommend using Halo-specific group names rather than generic User or Admin groups, which may conflict with other applications in your Okta organization.
-
Create the groups in Okta. Navigate to
Directory->Groupsand create:Halo_UserHalo_Admin
-
Assign users to the appropriate group.
-
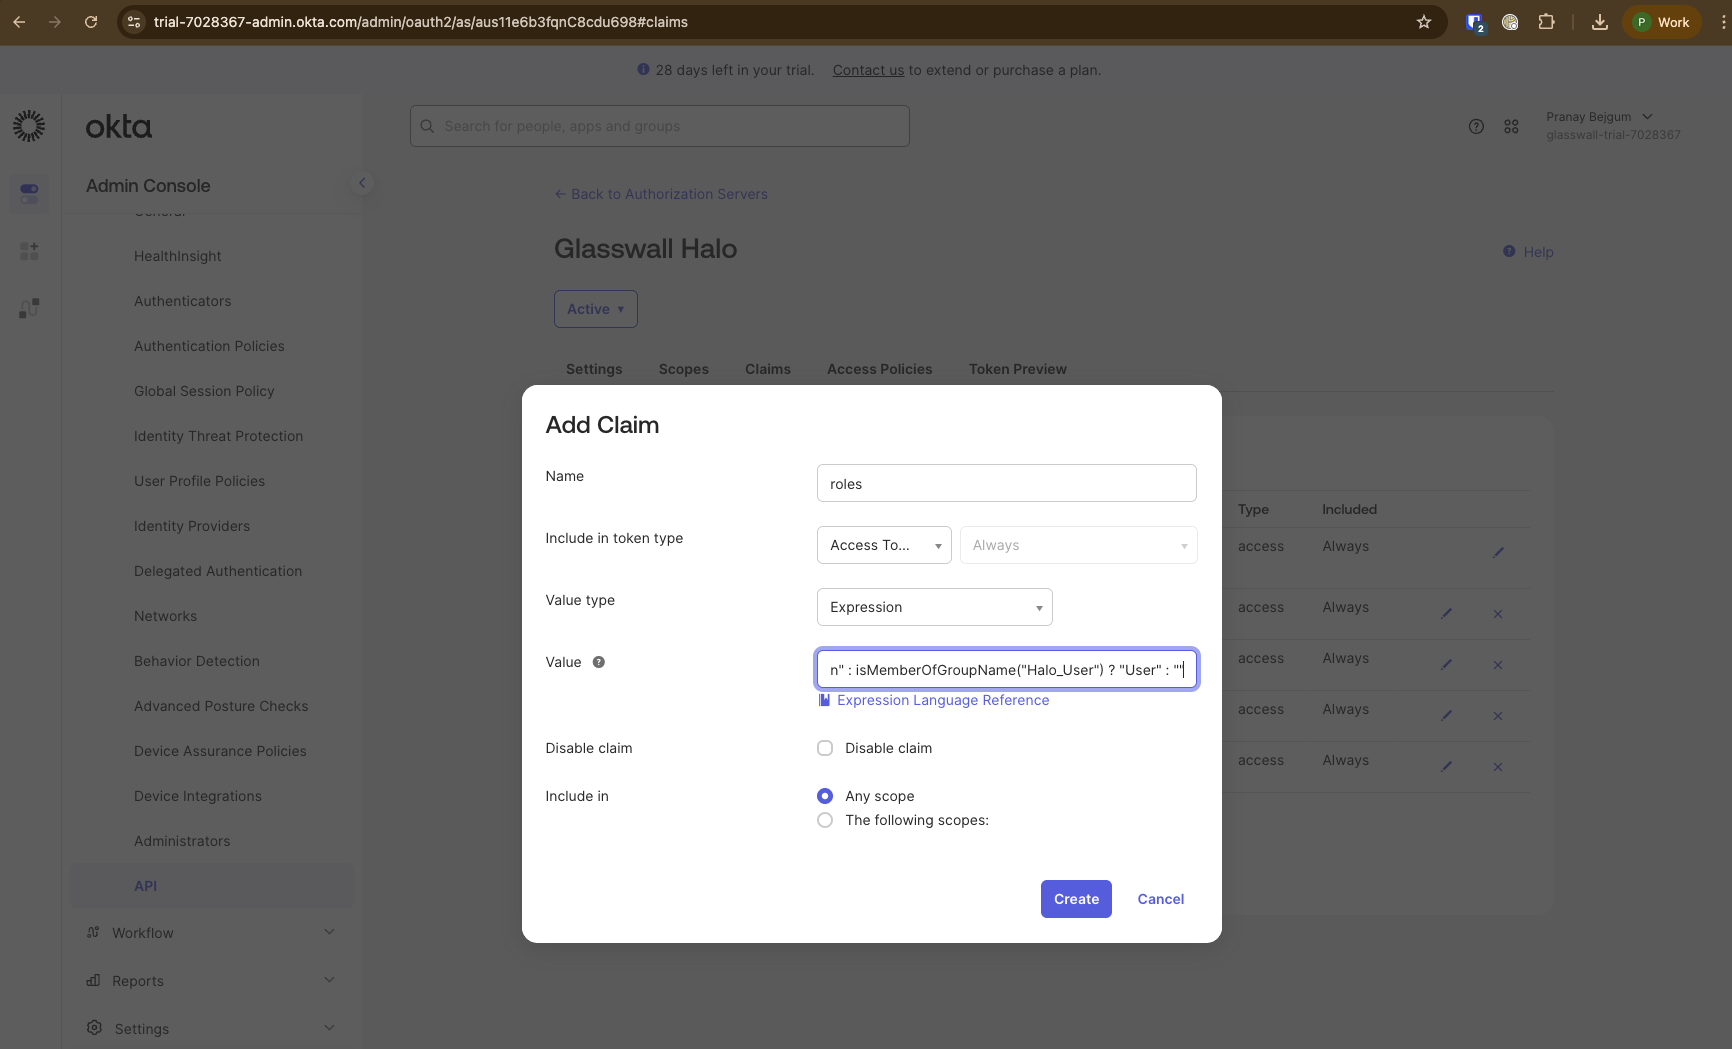
Navigate to the authorization server's
Claimstab and create arolesclaim that translates group names to Halo role values:- Name:
roles - Include in token type:
Access Token - Value type:
Expression - Value:
isMemberOfGroupName("Halo_Admin") ? "Admin" : isMemberOfGroupName("Halo_User") ? "User" : "" - Include in:
Any scope
- Name:
Note: The
isMemberOfGroupName()function only works in user-context flows (e.g., Authorization Code). It does not apply to Client Credentials (machine-to-machine) flows.
API roles (role claim)
This claim is used by the API-Access service to authorize operations. Since API clients use the Client Credentials flow (no user context), group membership expressions don't apply. Instead, map the client_id to a role value.
-
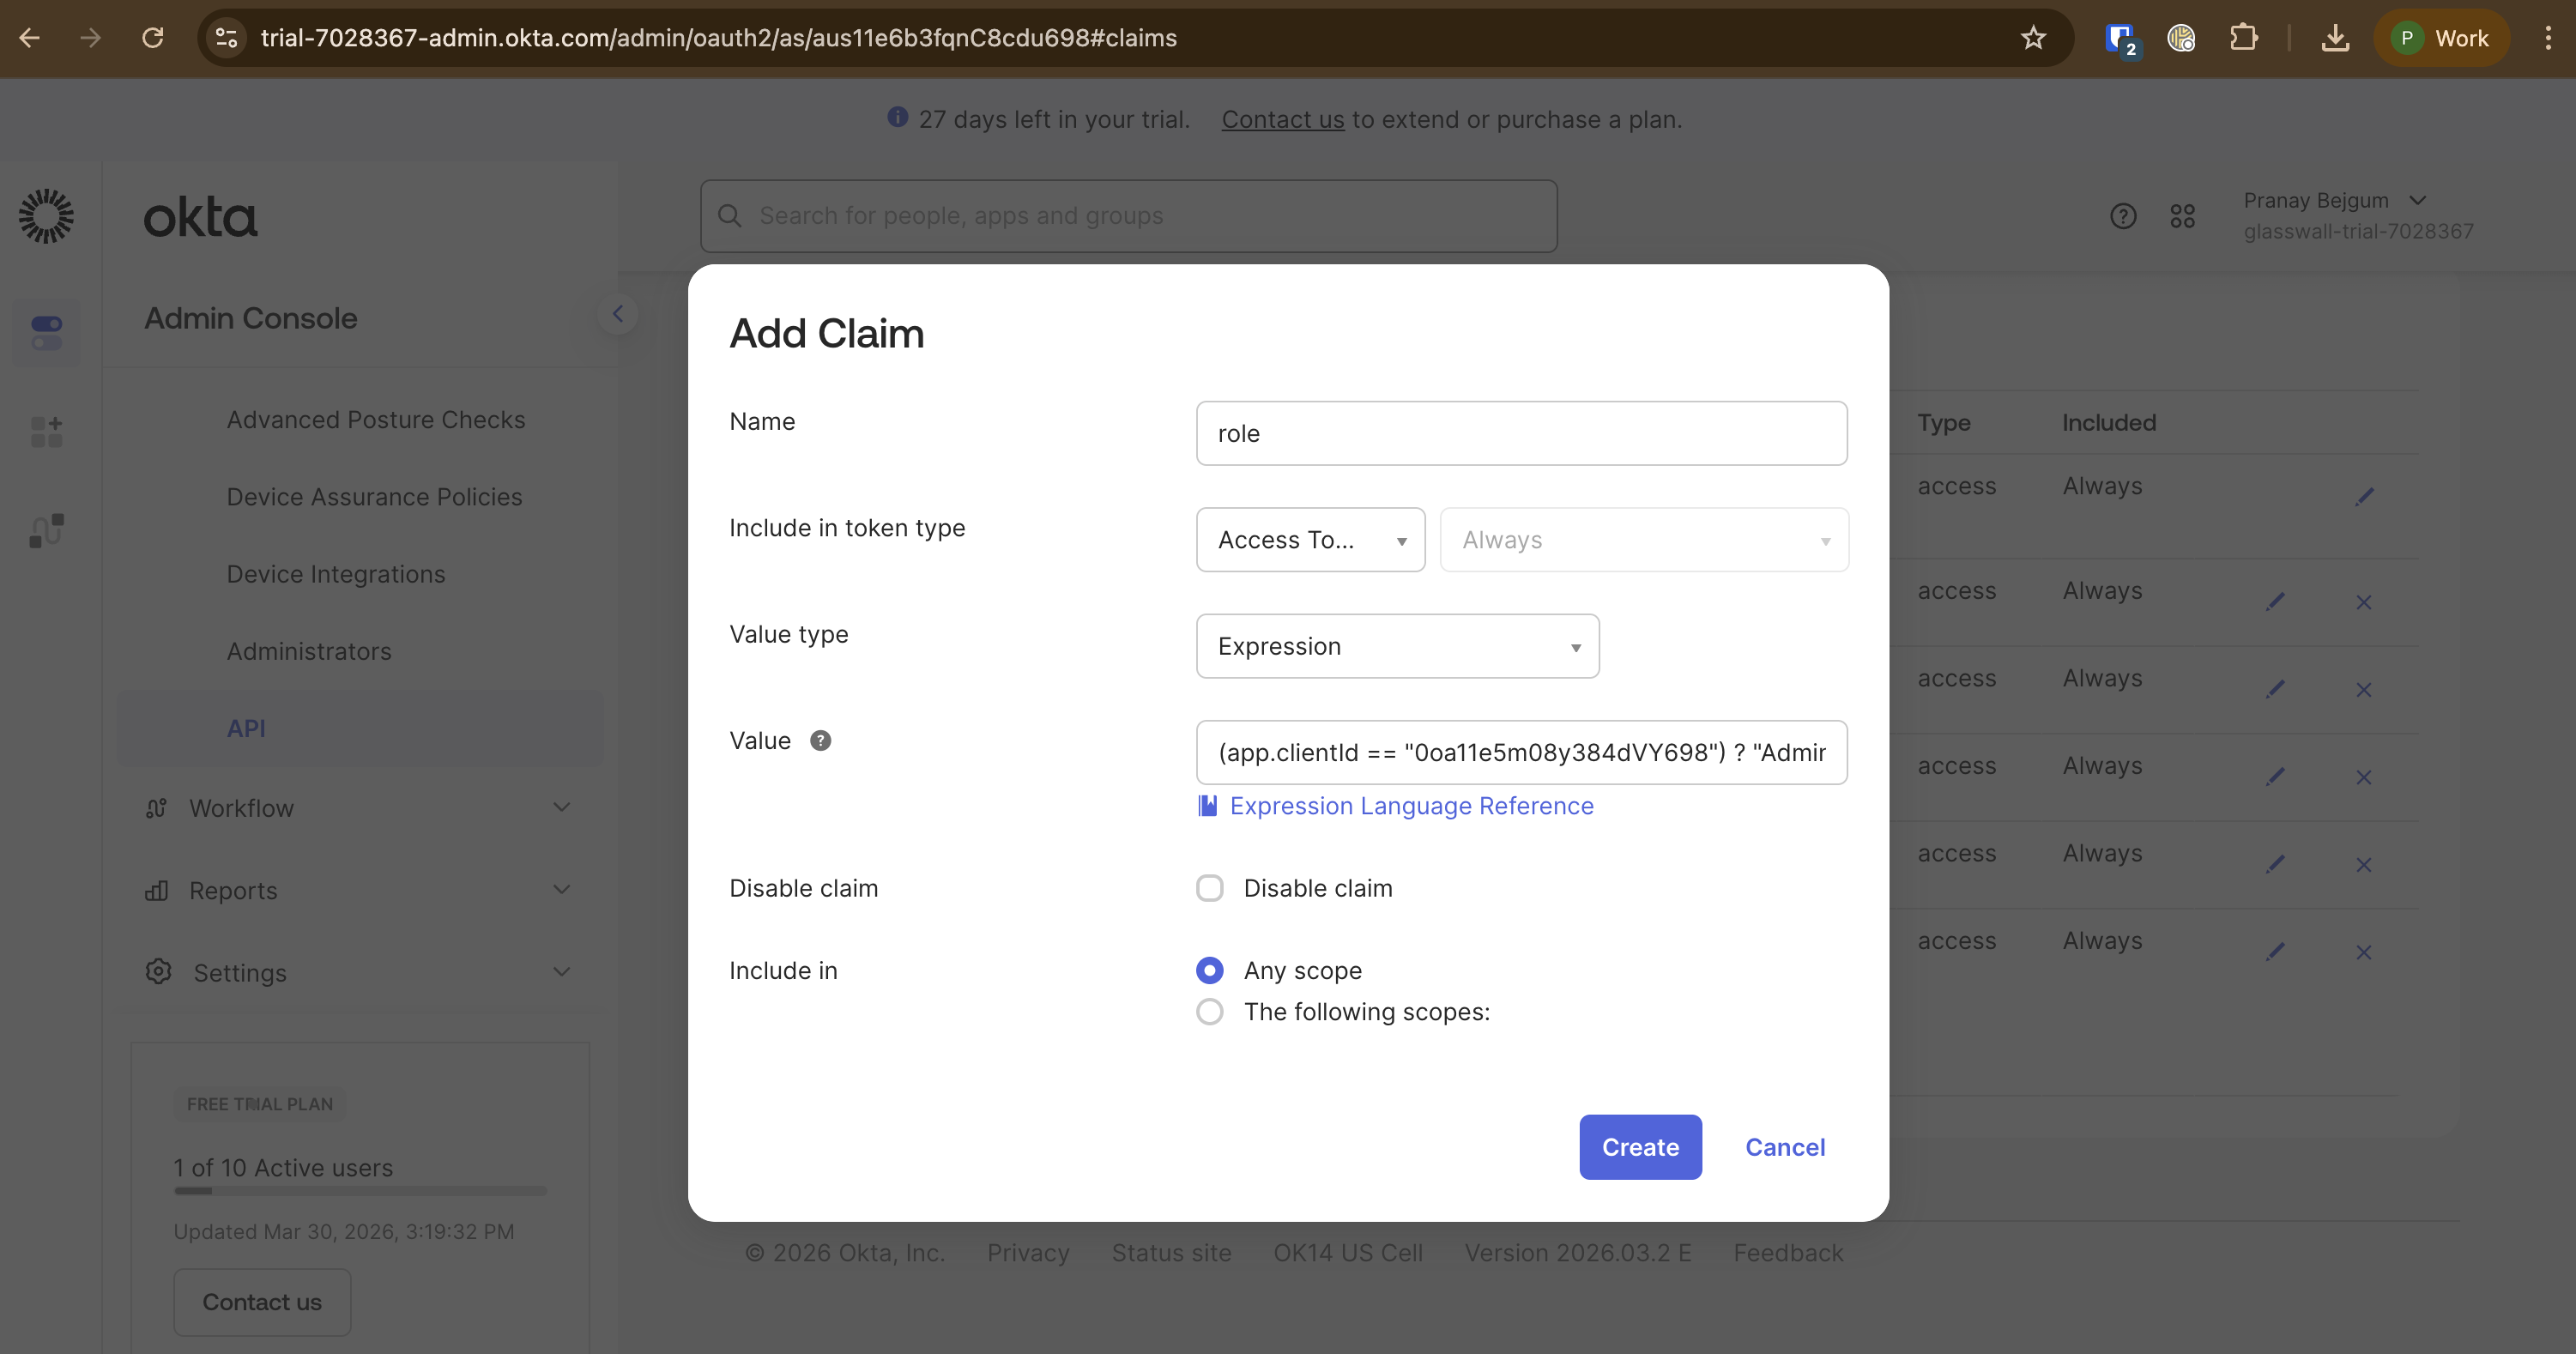
Navigate to the authorization server's
Claimstab and create aroleclaim:- Name:
role - Include in token type:
Access Token - Value type:
Expression - Value:
(app.clientId == "<your-api-client-id>") ? "Admin" : "User" - Include in:
Any scope
- Name:
Note: Replace
<your-api-client-id>with theclient_idof your API Services application. Add additional conditions for multiple API clients, e.g.:(app.clientId == "<client-1>") ? "Admin" : (app.clientId == "<client-2>") ? "Admin" : "User"
Next steps
With the authorization server configured, proceed to set up one or both of:
- Halo Portal SSO - configure Okta as the identity provider for the Halo Portal
- Halo API Bearer Authentication - configure Bearer token authentication for the Halo API
Each guide includes configuring an access policy on this authorization server for its respective client.