Azure Blob Storage
Objective
Set up automated file sanitization in Azure Blob Storage using Glasswall Halo API via the event grid functionality and service bus queues.
Azure Blob Storage Integration Guide
- Prerequisites
- Step 1 - Create a service bus namespace
- Step 2 - Create a service bus queue
- Step 3 - Set up source blob storage account events
- Step 4 - Create a function app
- Step 5 - Create a function
Prerequisites
- Azure Portal account
- Source Azure Blob Storage account
- Destination Azure Blob Storage account
Notes:
- Ensure that all the configuration parameters are correctly named and added to the Azure Function App. Any mismatches will lead to failures.
- This guide covers flat files only and does not include detailed logging.
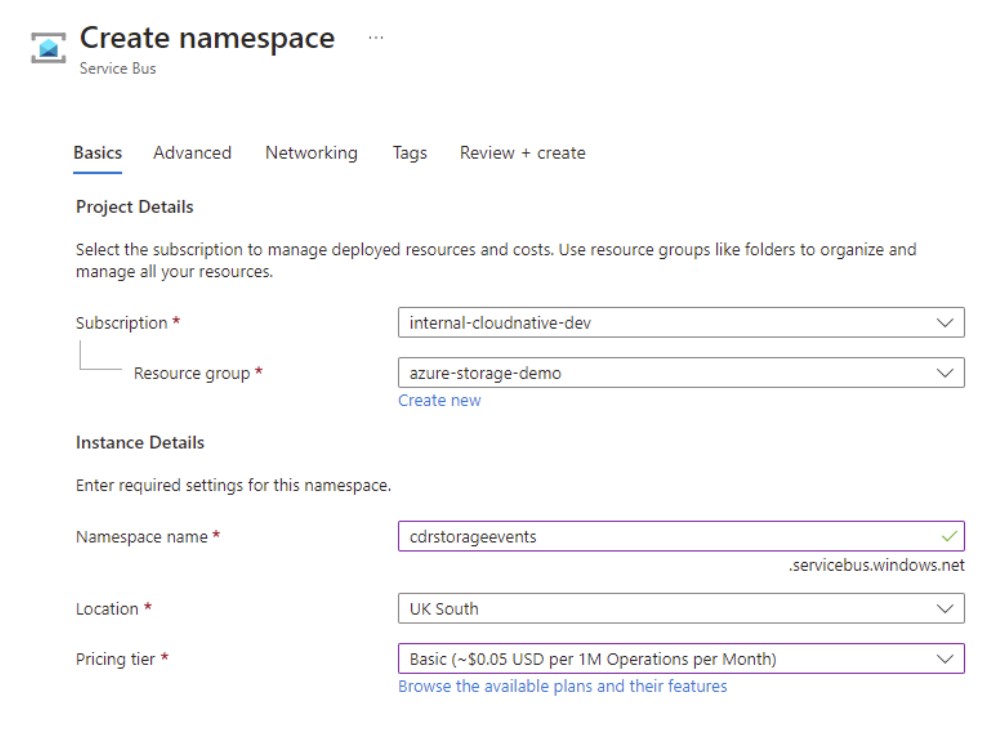
Step 1 - Create a Service Bus namespace
First, you need to create a Service Bus namespace and a queue so that you can receive the event grid messages.
Note: the tier and settings are related to your load or it.
-
Sign in to Azure Portal.
-
Navigate to All services > Integration > Service Bus.
-
In the Basics tab of the Create namespace page, create a Namespace.
Note: the sample code provided will work with all tiers so select the settings appropriate for your usage, and enter all mandatory configuration.
For more detailed information about creating a Service Bus namespace and queue, please refer to Azure documentation.
Step 2 - Create a Service Bus queue
Once the namespace is created, we need to create a queue to post the events to.
-
On the Service Bus namespace page, select Queues in the left navigational menu.
-
On the Queues page, select + queue on the toolbar.
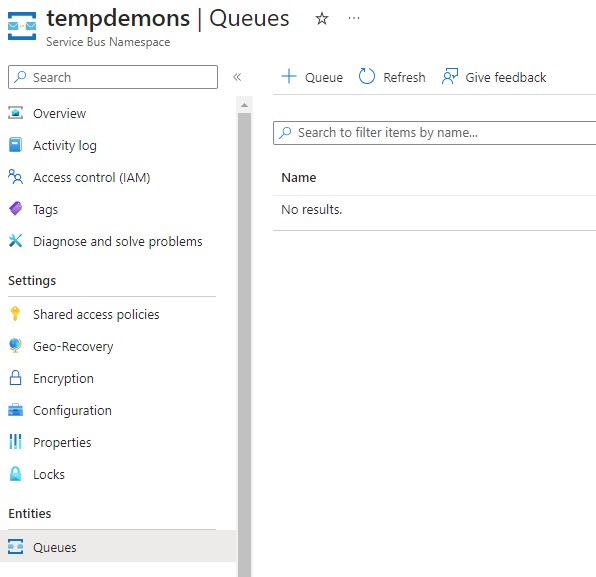
Note: as with the namespace, the settings are down to preference – for this sample we are simply taking the defaults.
- Enter a name for the queue, and leave the other values with their defaults.
The name you choose doesn't matter as the sample code allows it to be configured to whatever is set.

- Select Create.
For more detailed information about creating a Service Bus namespace and queue, please refer to Azure documentation.
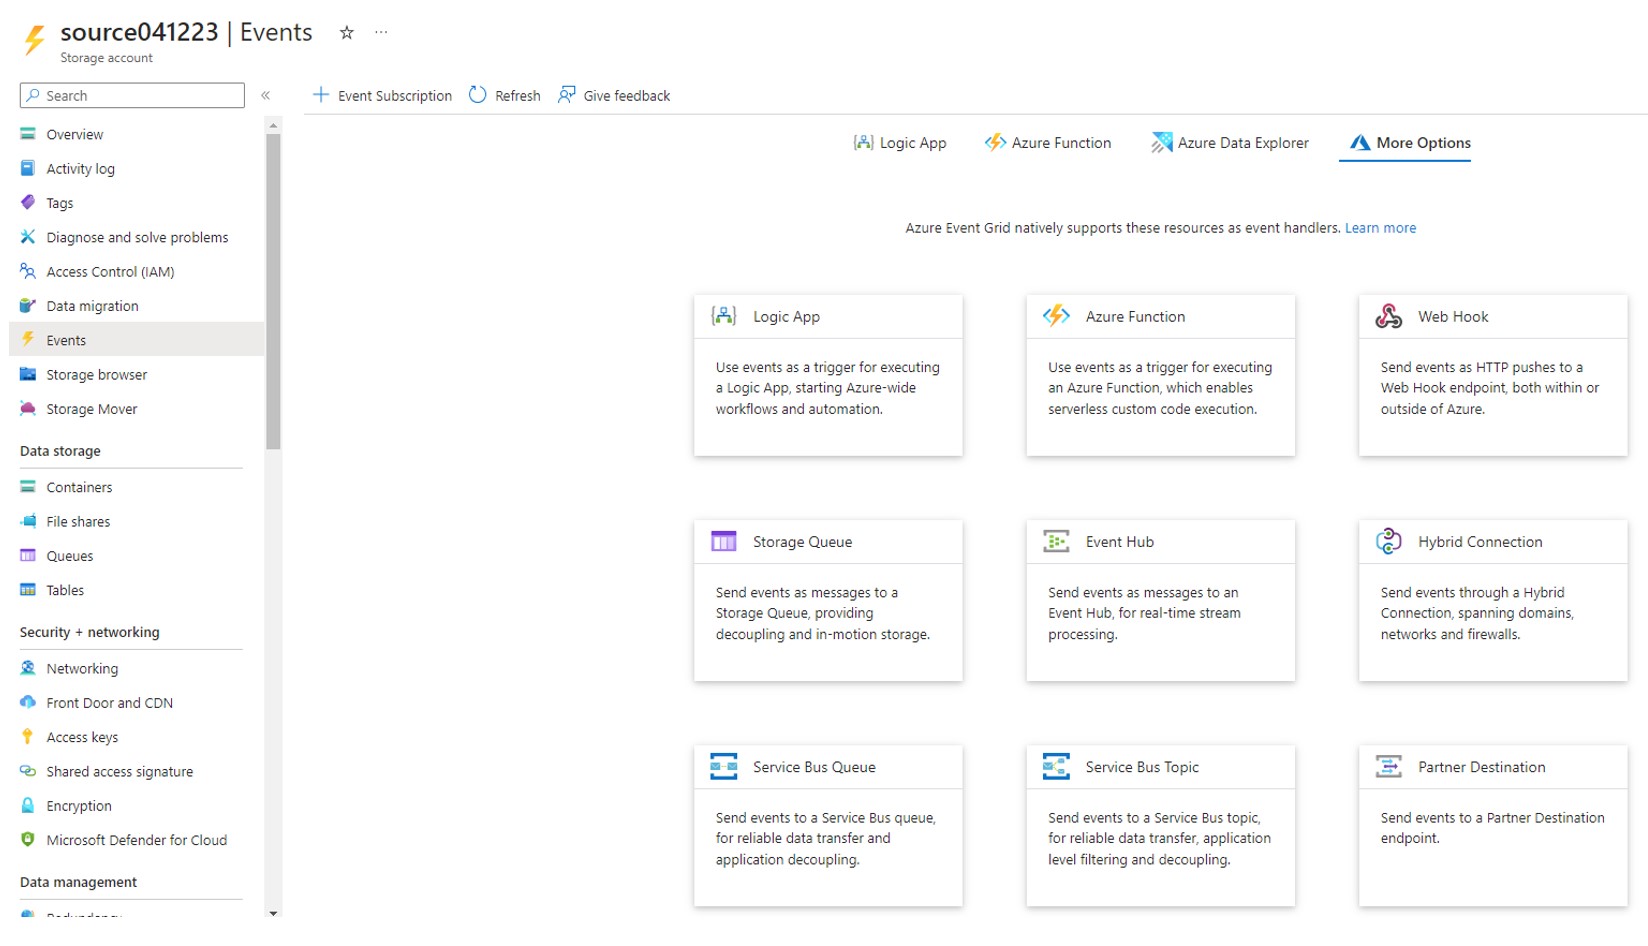
Step 3 - Set up source Blob Storage account events
After creating the Service Bus namespace and queue, configure the source Blob Storage account to emit events as messages to the queue.
Although these events can be configured to trigger an Azure Function directly, each event must be acknowledged within 30 seconds. While most files are processed quickly, larger files or periods of high load can exceed this window.
To avoid this limitation, we recommend configuring Event Grid to deliver events to the Service Bus queue and allowing the Azure Function to consume messages from the queue. This approach provides greater resilience and flexibility by decoupling event ingestion from processing.
- To set up events, navigate to the source storage account and select Events > More options > Service Bus queue.
-
Enter a Name under event subscription details.
-
Enter a System topic name under topic details.
-
From the Filter to event type dropdown, select Blob created.
This means there will be a message for every new file in Blob Storage across the storage account.
- Finally, choose the queue you created in the previous step under endpoint detail.
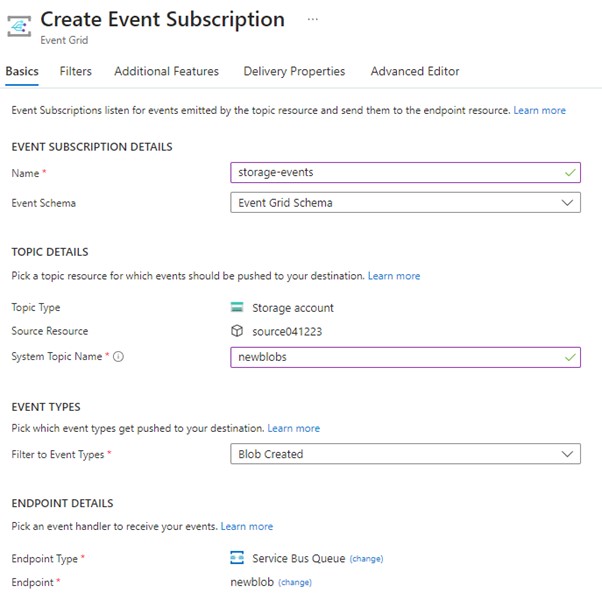

A new Service Bus message is now placed in the queue for every file uploaded to that storage account, which will be consumed via a function we will create next.
Step 4 - Create a Function App
You must have a Function App to host the execution of your functions. The Azure function that consumes the Service Bus messages you just created will be able to use the event grid details to identify the new file.
Your function should perform the following:
- Identify the new file from the Service Bus message.
- Access the file from the source storage account.
- Send it in a request to Glasswall Halo’s Synchronous API.
- Create (if it doesn’t already exist) a container of the same name in the destination storage account.
- Write either the protected file (as the same name as the original) or a text file if it couldn’t be protected.
-
To create a Function App, navigate to the Create a resource page.
-
In the New page, select Compute > Function app.
-
Adjust the settings to suit your function code and hosting option:
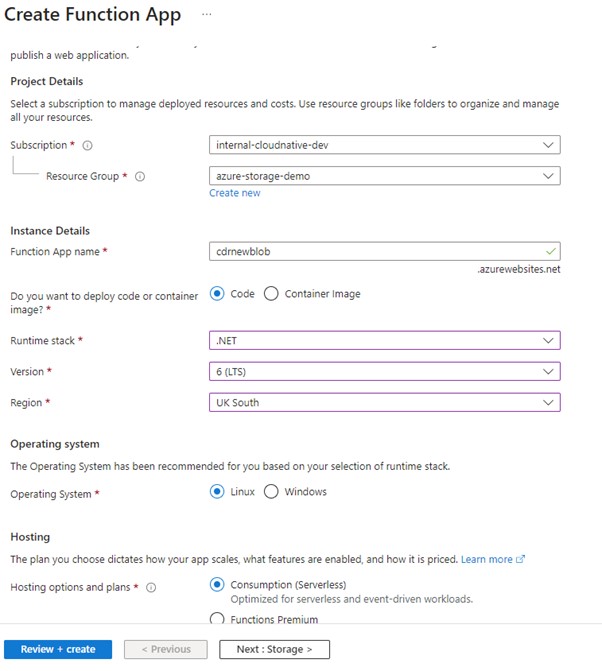
For more detailed information about creating a Function App, please refer to Azure documentation.
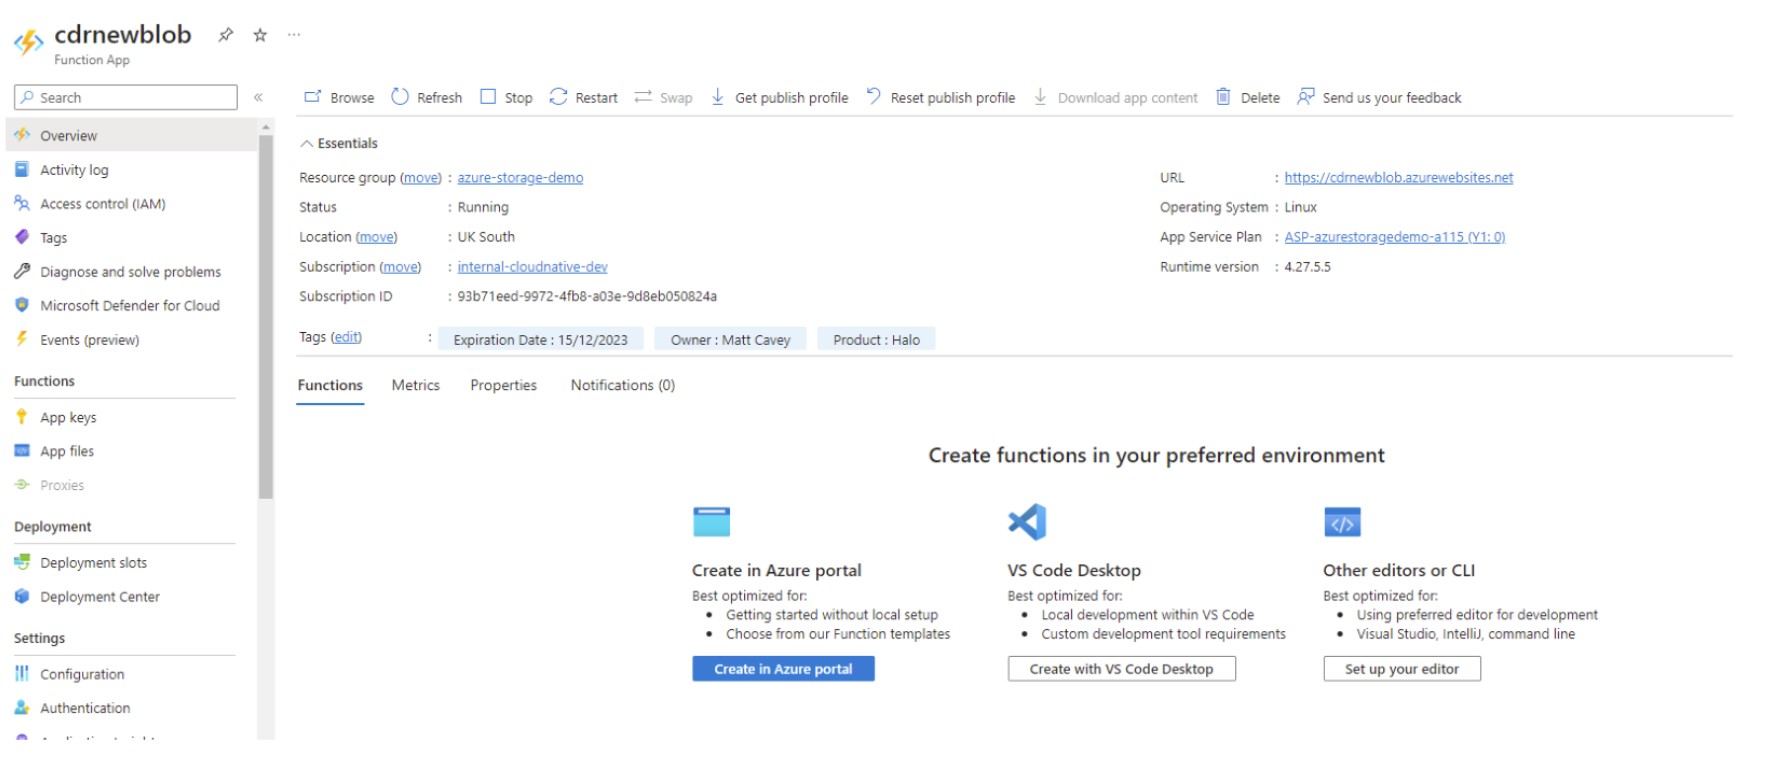
Step 5 - Create a function
Once the Function App is created, you can create the function.
- In the Function App overview, it provides guidance for various methods of getting your code deployed.
Choose the method most suitable for your selected codebase.

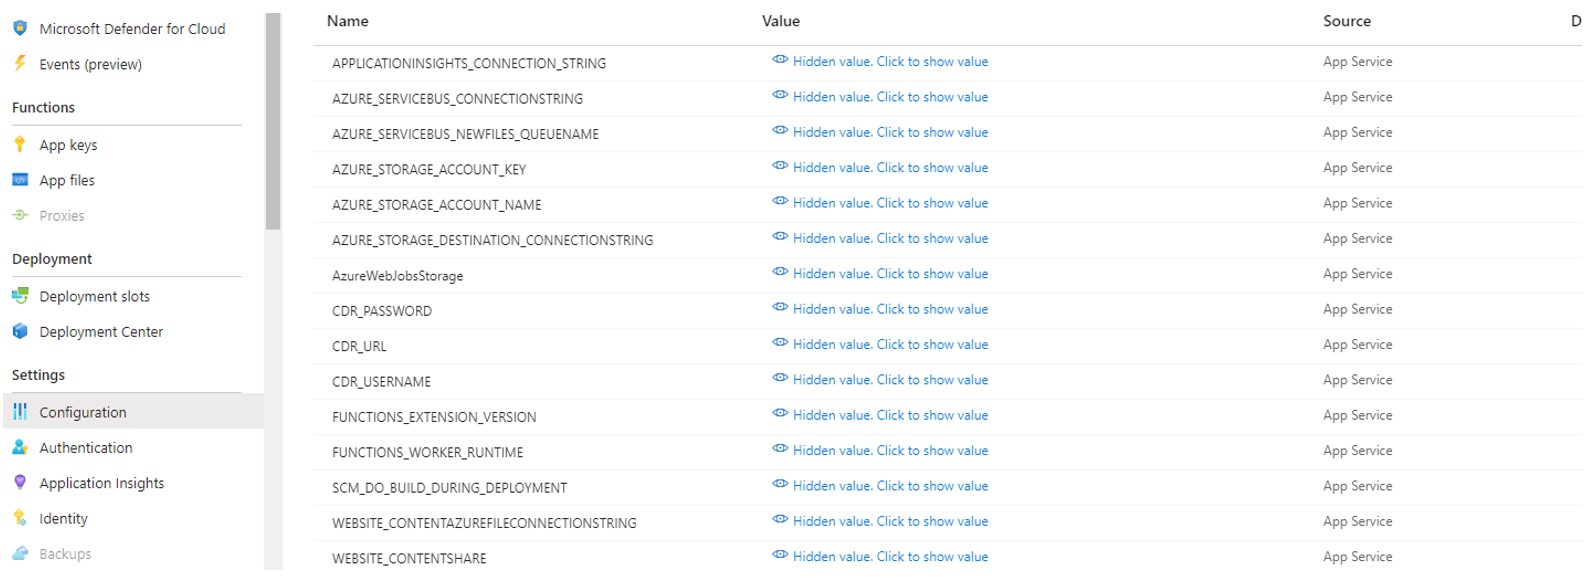
- The following configuration needs to be added to the Function App via Settings > Configuration.
All values can be sourced from the relevant resources in the Azure Portal. For access to Glasswall Halo either use your instance and authentication, or for trial purposes contact our sales team for basic authentication credentials to use our public endpoint.
Configuration
| Key | Value |
|---|---|
| Azure_servicebus_connectionstring | Connection string for service bus |
| Azure_servicebus_newfiles_queuename | Queue name for new blob events |
| Azure_storage_account_name | Source storage account name |
| Azure_storage_account_key | Source storage account key |
| Azure_storage_destination_connectionstring | Destination storage account connection string |
| cdr_username | Username for Halo API basic auth |
| cdr_password | Password for Halo API basic auth |
| cdr_url | URL for CDR-file endpoint (e.g. https://api.glasswall.com/api/v3/cdr-file) |
Once all the steps are complete, any file placed in the source Azure Blob Storage account is automatically protected by Glasswall Halo and written to the destination storage account. If a file cannot be protected, a text file containing an error message is written instead.