To configure your Fortigate firewall and integrate it with the Glasswall Halo ICAP server, please follow this configuration guide.
Note: these steps are documented as per Fortigate v7.4.
Configure Interfaces and Routes
Configure Static IP to Inside Interface
Two Network Interfaces are attached to the VM:
- Management Interface - this is the primary network interface attached to the VM when it is created. By default the static private IP address of the Interface is registered in the firewall.
- Inside Interface - this is an extra Interface attached to VM after it is created. By default no IP address might be shown to this Interface in the firewall.
To configure the static IP to the Inside Interface in the firewall:
- Login to the Management Portal and navigate to Network -> Interfaces.
- Select and edit the Inside Interface.
- Enter the IP/Netmask and click OK.
Create a Static Route
A static route is needed in the firewall so that traffic from all ports will go to the internet via a given Gateway IP address and Interface
To create a static route:
- Navigate to Network -> Static Routes and create a new route.
- Select Subnet as the Destination and enter
0.0.0.0/0.0.0.0. - Enter the Subnet's gateway IP address under Gateway Address. Typically the first number of the subnet is the gateway. e.g. 192.168.xx.1.
- Select the Interface that should be used to reach the gateway IP address and click OK.
Configure ICAP
By default the ICAP feature in the Fortigate firewall is disabled and needs to be enabled.
- Login to the Management Portal and navigate to System -> Feature Visibility and enable ICAP under Additional Feature.
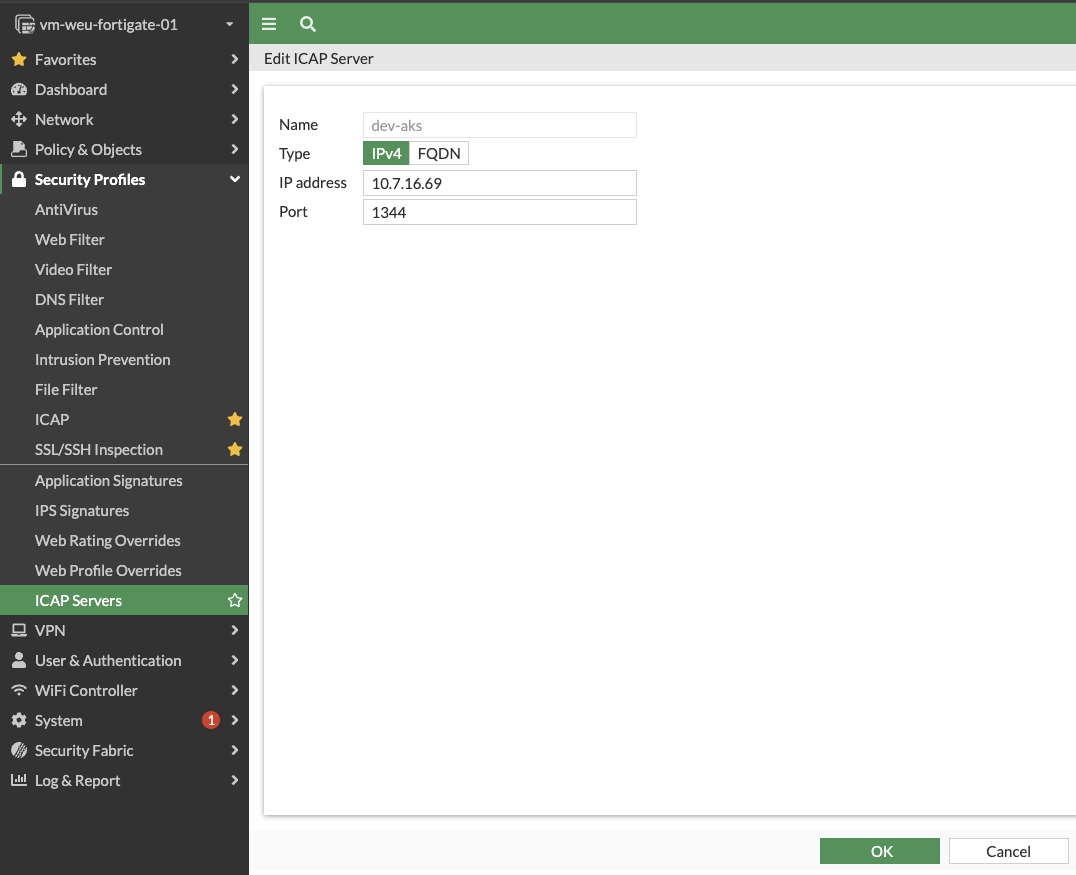
- Create an ICAP server by navigating to Security Profiles -> ICAP Servers and create a new server.
- Enter the name, IP address and port(default 1344) of the ICAP server, and click OK.
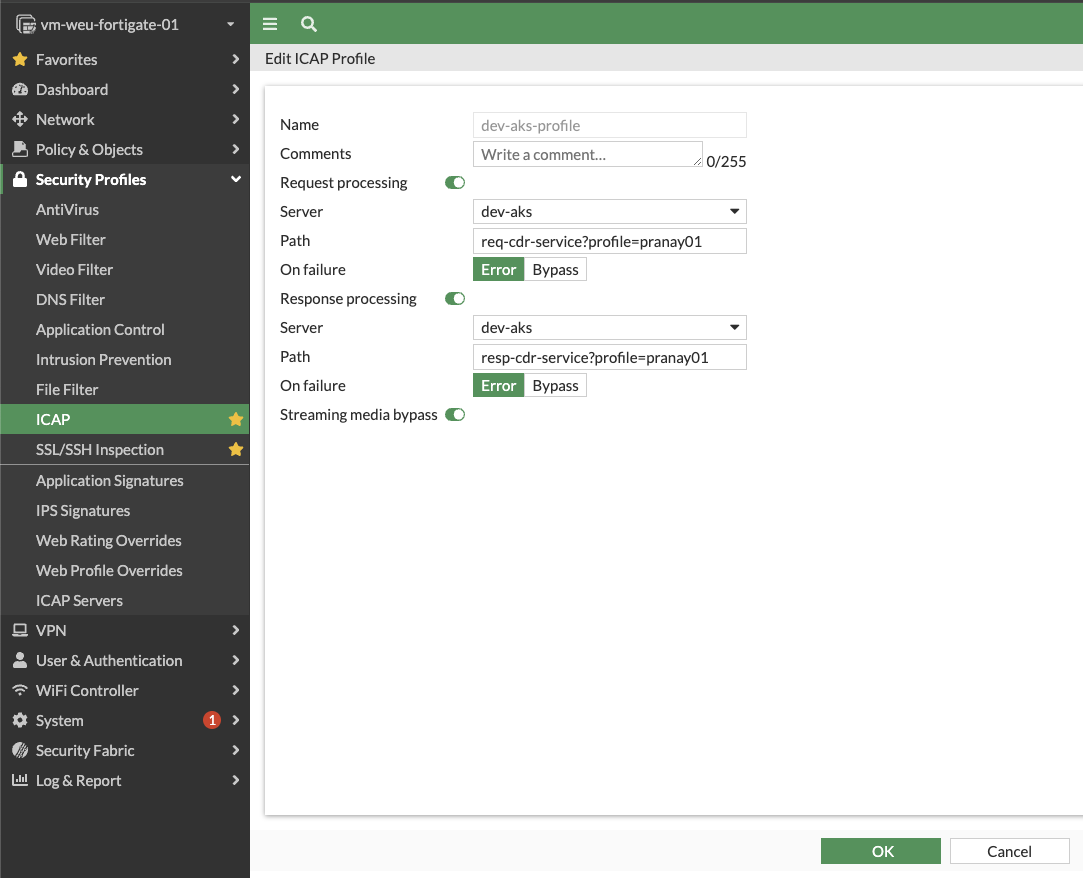
Create ICAP profile
- Navigate to Security Profiles -> ICAP and create a new profile.
- Enter a name for the profile.
- Enable Request processing if you want to process files sent in the requests.
- Select the Server created in the previous step from the drop-down.
- Under Path enter
req-cdr-service. Optionally pass an ICAP profile e.g.req-cdr-service?profile=test-profile1. - Select one of the options when ICAP fails to process the files - Error or Bypass.
- Enable Response processing if you want to process the files being received in the response.
- Select the Server created in the previous step from the drop-down.
- Under Path enter
resp-cdr-service. Optionally pass an ICAP profile e.g. `resp-cdr-service?profile=test-profile1. - Select one of the options when ICAP fails to process the files -
ErrororBypass. - Enable Streaming media bypass.
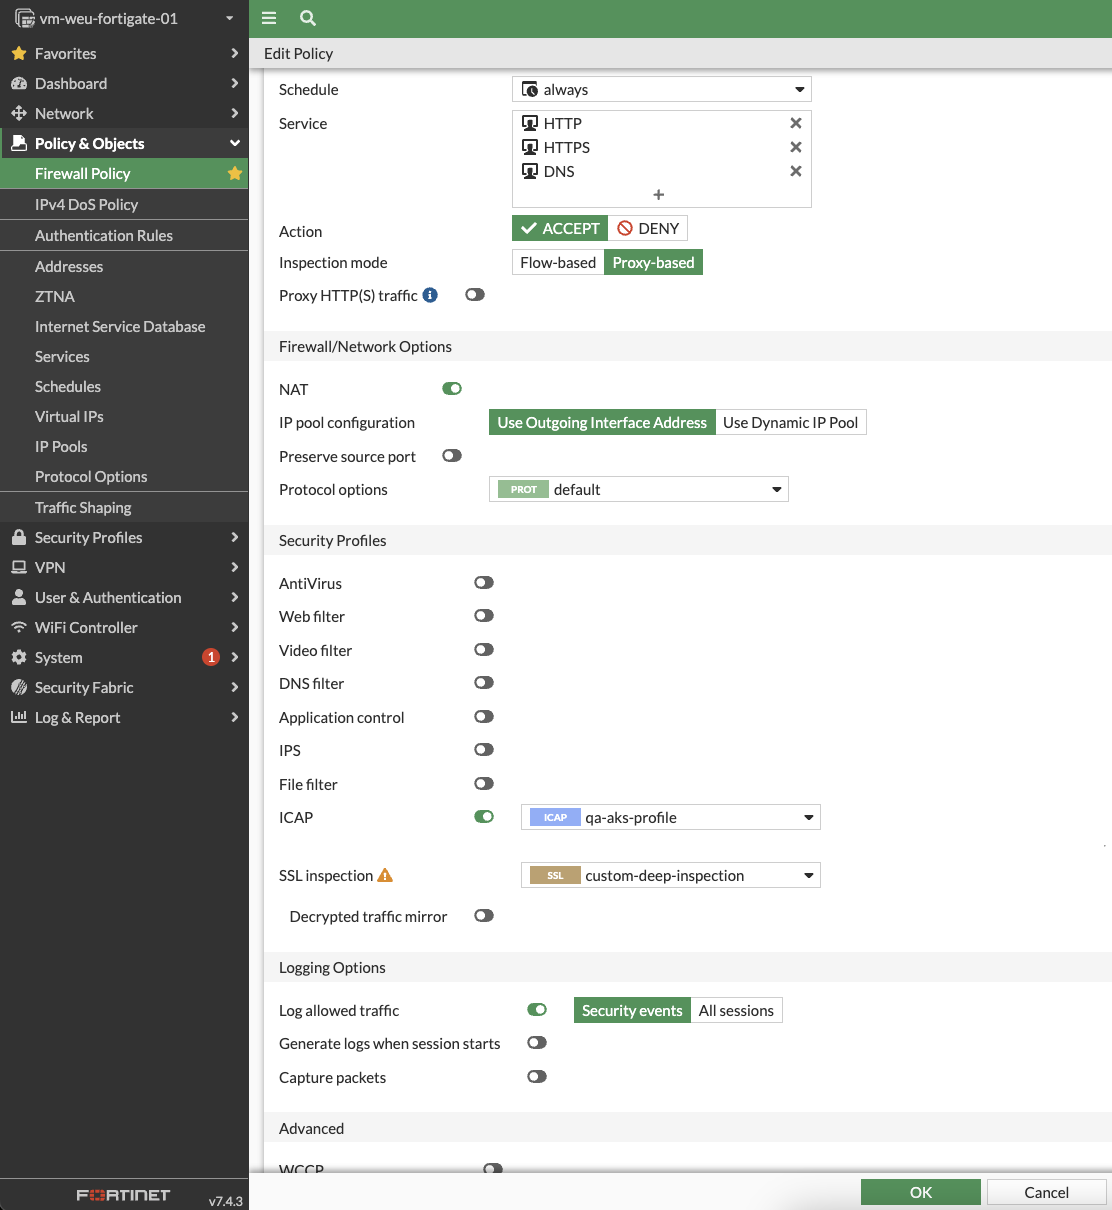
Create or update Firewall policy
- Navigate to Policy & Objects -> Firewall Policy and create or edit a Firewall policy to enable ICAP integration.
- For Inspection mode, select the Proxy-based option.
- From the SSL inspection drop-down, select deep-inspection or custom-deep-inspection.
- Enable the ICAP option and select the ICAP profile created in the previous step.
- Click OK.
Download CA certificate
As we have now enabled the SSL Inspection in the firewall, we need to download the CA certificate and import it in the user's machine or browsers. This ensures that users won't see SSL errors while accessing internet.
- Navigate to Security Profiles -> SSL/SSH Inspection and select the profile used in the Firewall policy.
- Click Download beside CA certificate.
- Copy it to user's machines and add it to the trusted list under CA certificates.
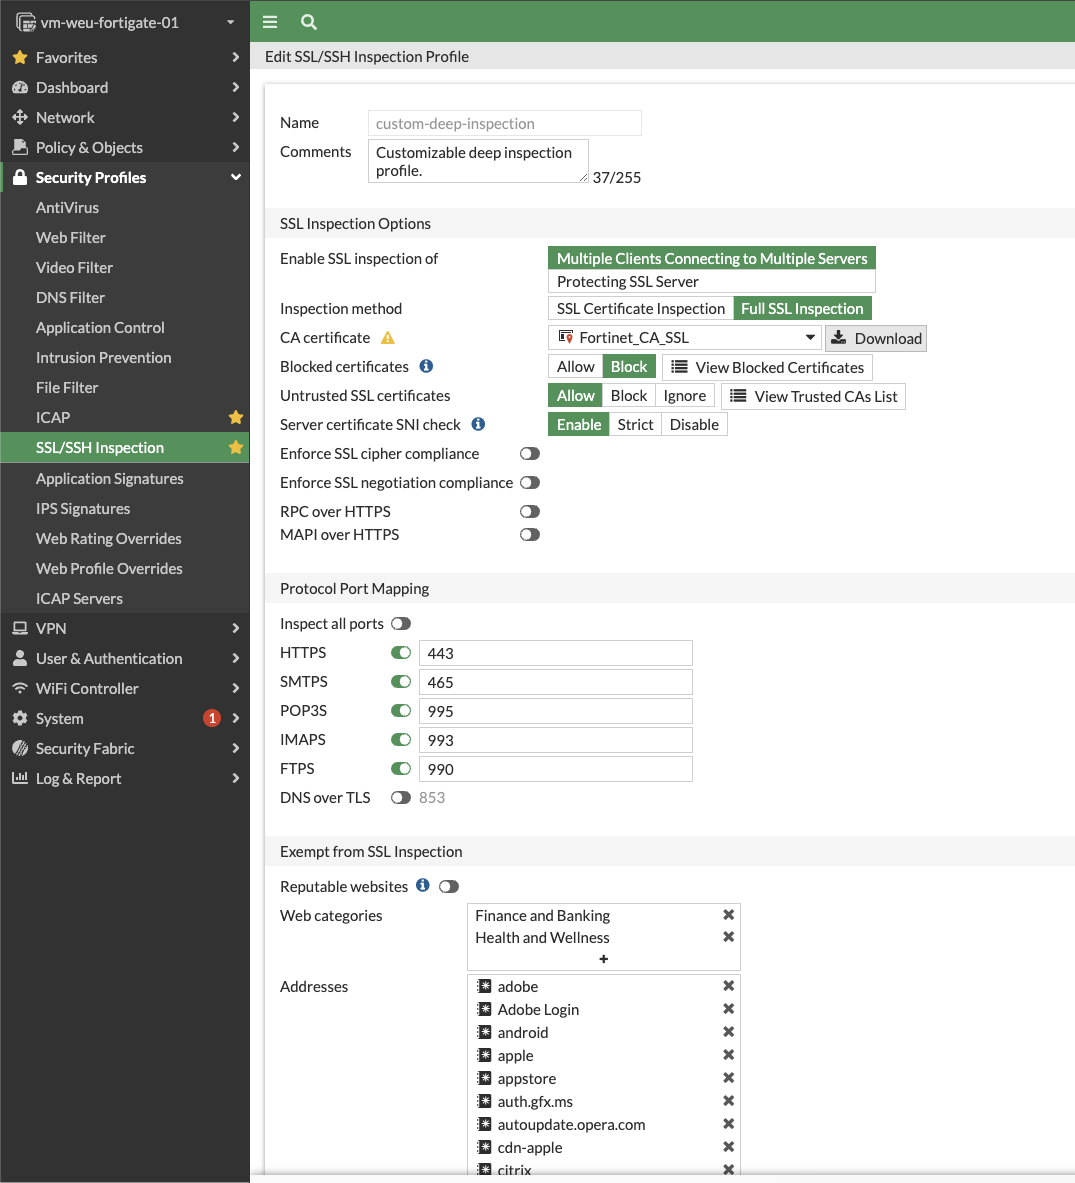
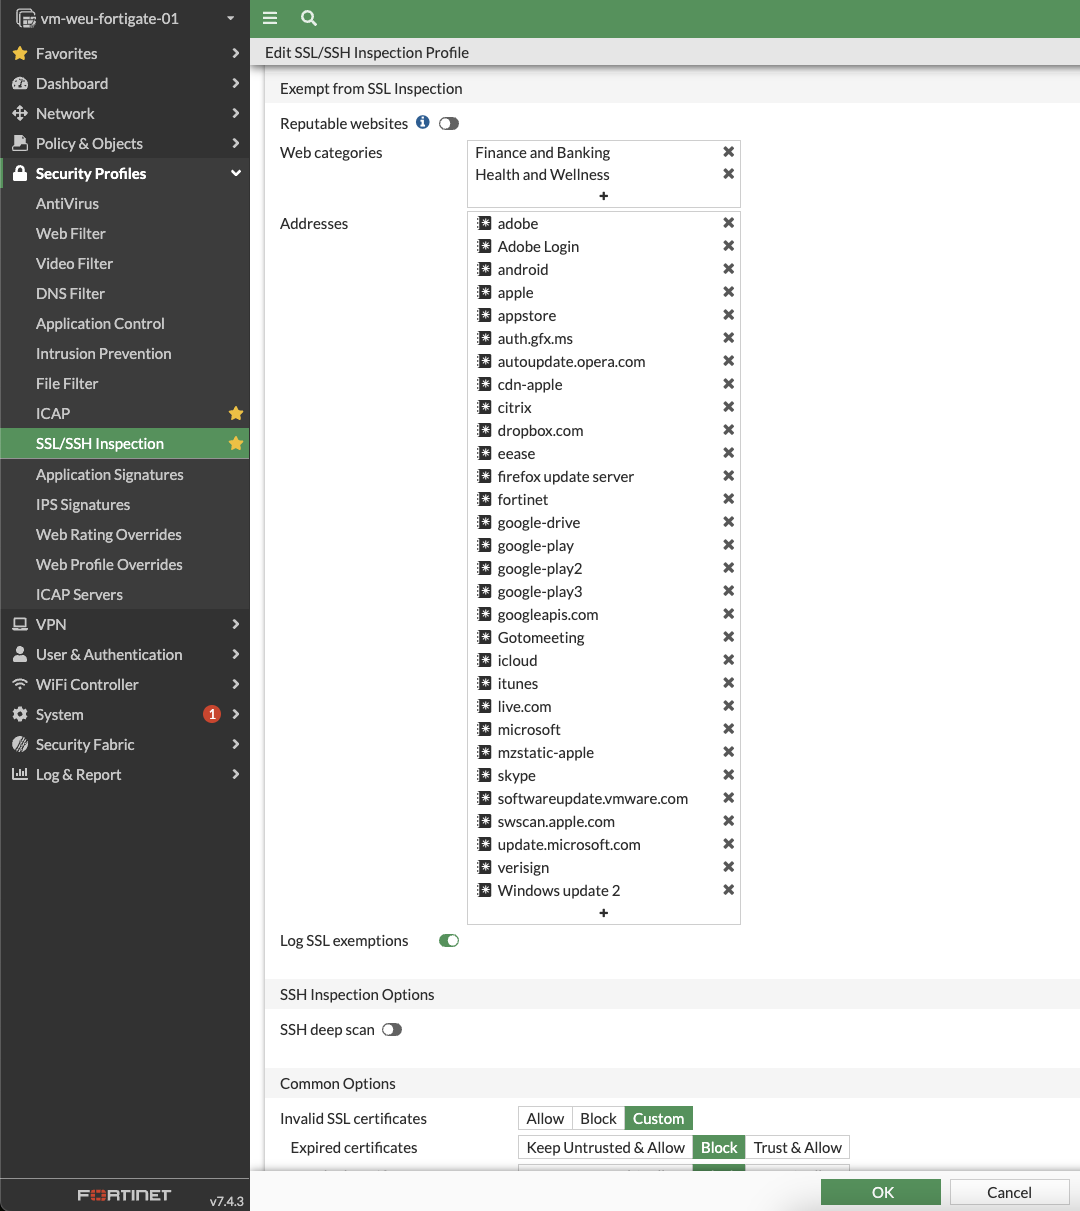
Exempt websites from SSL Inspection
We need the ability to exempt certain websites from SSL inspection for various reasons, such as compatibility issues that arise when SSL inspection is enabled. By default, specific addresses are already exempted from SSL inspection.
- Navigate toSecurity Profiles -> SSL/SSH Inspection.
- Select Log SSL exemptions so the firewall will log any such exemptions.
- If required, add specific web categories in this section to exempt from SSL Inspection.