Overview
The Glasswall cloud-native Glasswall Halo provides security teams with out-of-the-box file protection capabilities. Built on a Kubernetes architecture, it provides organizations with protection that can scale infinitely to meet demand. Glasswall Halo's OpenAPI specification compliant design provides developer-centric web services, while open source connectors provide easy on-premises and cloud integrations.
Whether you're a developer aiming to enhance your application's security or an organization dedicated to safeguarding sensitive information, this guide will enable you to quickly access and use Glasswall Halo.
Step 1 - Access Glasswall APIs
Glasswall APIs can be accessed via:
Step 2 - Authentication
To access Glasswall APIs, you'll need to contact us at sales@glasswall.com for a designated username and password. You will be sent an email containing a safe link granting access to our software distribution platform.
- Once you have your authentication credentials, navigate to Glasswall APIs Swagger.
-
Click Authorize.
-
In the popup, enter your authorisation credentials.
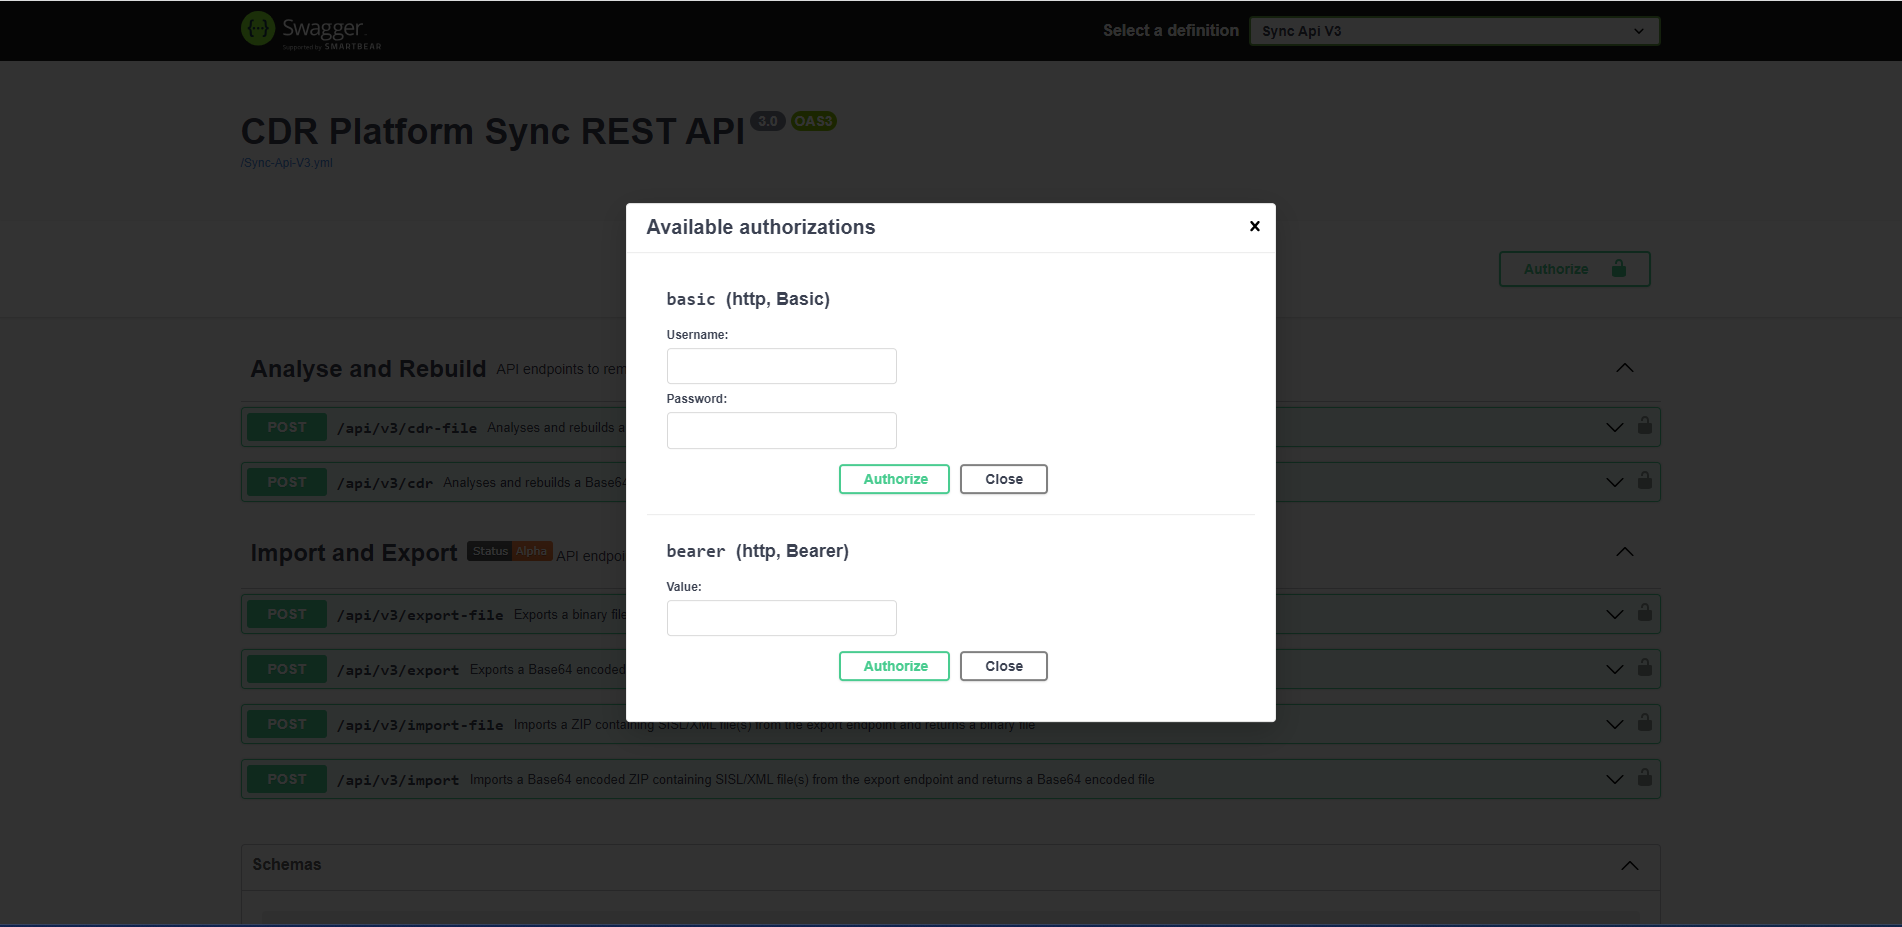
- Click Authorize to gain access to the Glasswall Halo API.
Step 3 - Process a file
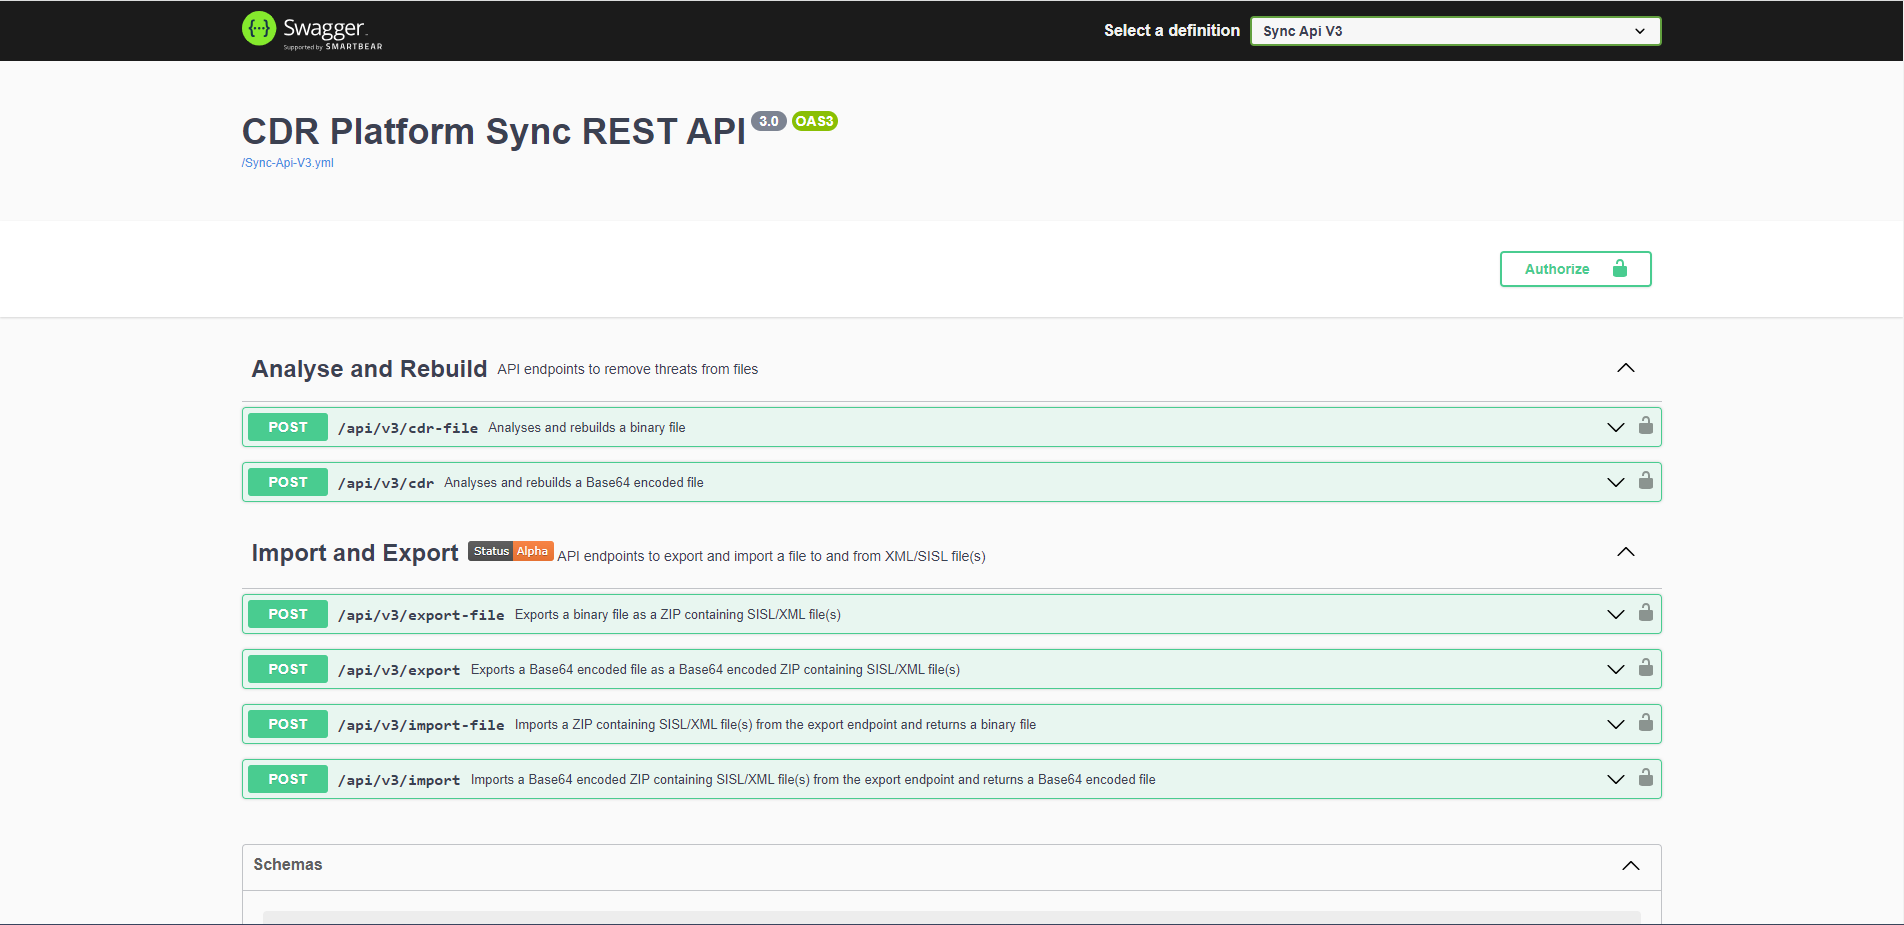
You can now start processing files using the various API calls available via Swagger.
-
Select the
api/v3/cdr-fileendpoint and the row expands to display a new section. -
Click Try it out in the top right of this new section.

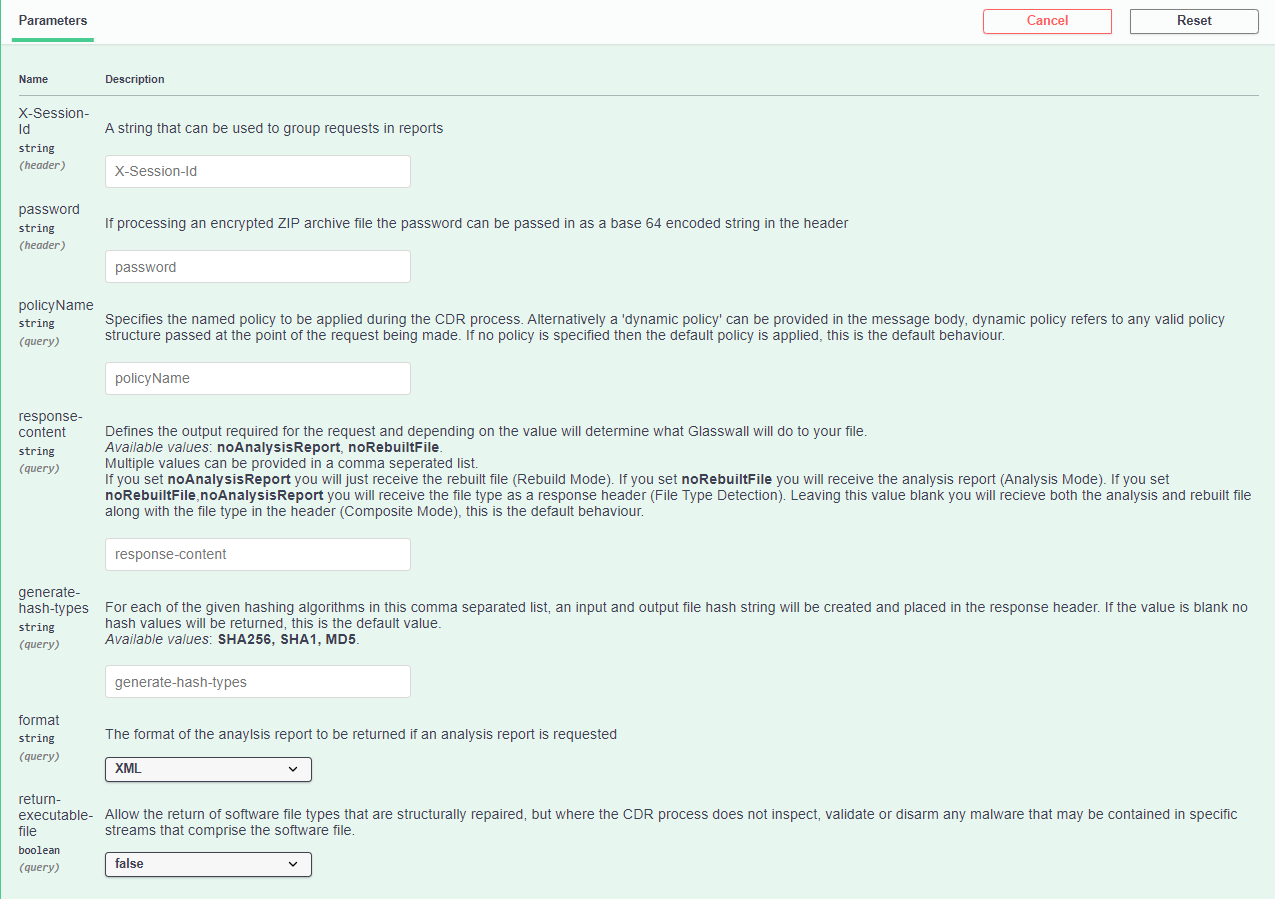
Step 3.1 - Set up parameters
Under the Parameter section for each API call there are several parameters you can alter depending on what you want to achieve. Most of these parameters are described on the page itself but you can learn more about them via Glasswall API Capabilities.
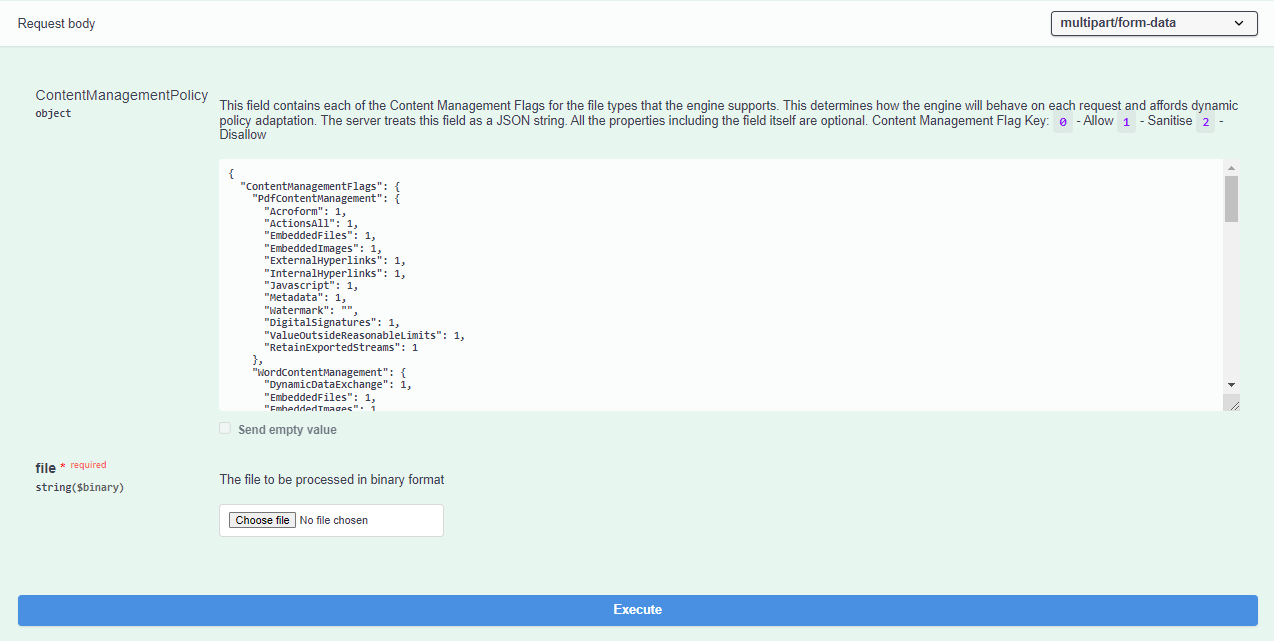
Step 3.2 - Adjust Request body
The next section is for the Request body. This is where you can provide instructions on how you want the file to be managed by adjusting the inputs as required.
Step 3.3 - Select file
Next, you can choose the specific file you want to work with.
-
Click Choose file, and select the file you want to process via the popup.
-
Once you're ready, click Execute. You have now initiated a request to Glasswall Halo which starts processing your chosen file based on your settings.
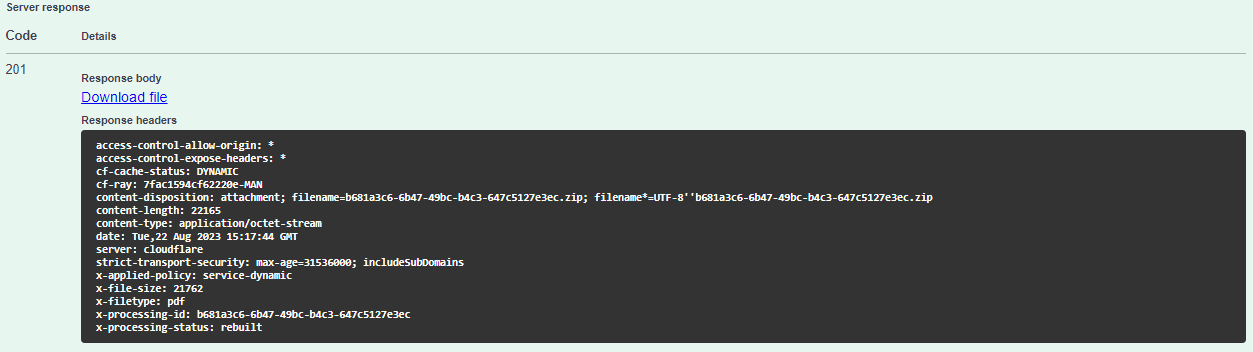
Step 3.4 - View response
If your request has been successful, you are presented with a status code and the output file.
- If you see a 201 status code it means your request was successful.
- You can download the binary output by clicking Download file.
However, if your request wasn't successful, you may see the following:
- A 500 status code indicates there is a problem with your file or Glasswall Halo and you may want to try another file.
- A 400 status code indicates there is an issue with your request and you may want to double-check your inputs and ensure they are correct.
- A 401 status code indicates there is an issue with your authorization credentials and you may want to double-check them.
Summary
Now that you have successfully performed CDR on your first file, you can either continue to use the Swagger UI to process more files or you can begin to integrate your application POC's programmatically using this endpoint and the basic authorisation credentials.
If you would like to trial Glasswall Halo by running it locally, you can follow our Evaluation via AWS Marketplace guide.
Glasswall Halo Deployment
You are able to deploy Glasswall Halo on your own infrastructure using one of the following approaches:
For more information please contact our sales team at sales@glasswall.com.