To deploy Glasswall Halo in a Proxmox VM, you can choose from the following two options:
Please refer to Troubleshooting & FAQs or the Proxmox Documentation for further information.
Deploying from an OVA/VMDK
Step 1 - Update Proxmox VE Host
Ensure your Proxmox host is up to date by running the following command to prevent compatibility issues.
- Online connectivity Update:
apt-get update
apt-get dist-upgrade
Step 2 - Create a New VM Shell
- Access the Proxmox Web UI and click Create VM.
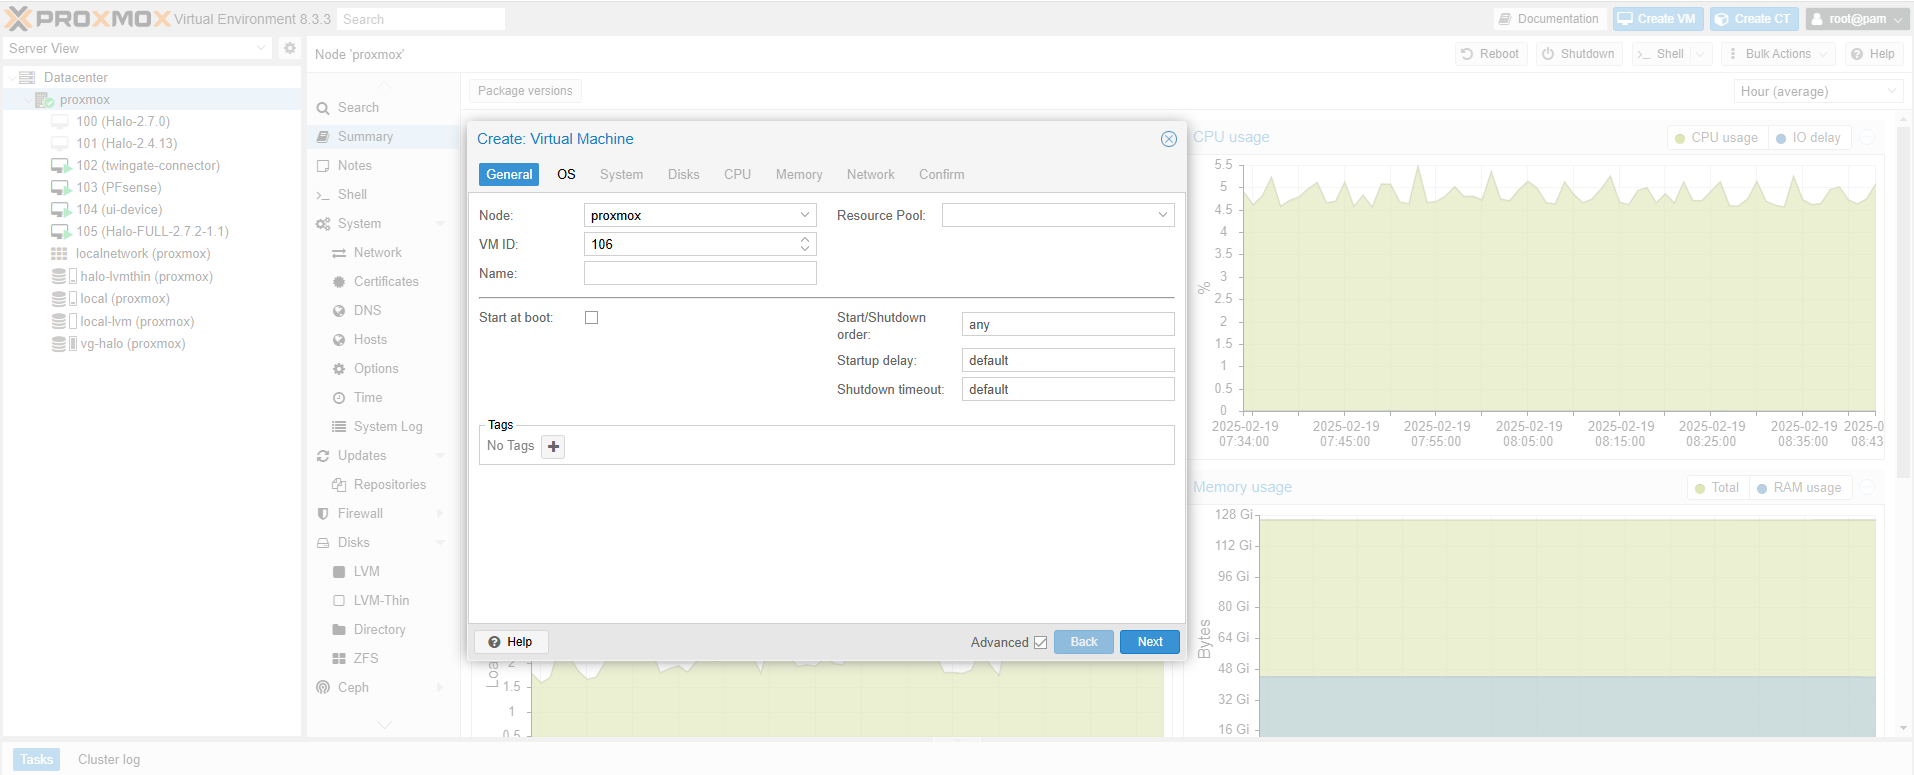
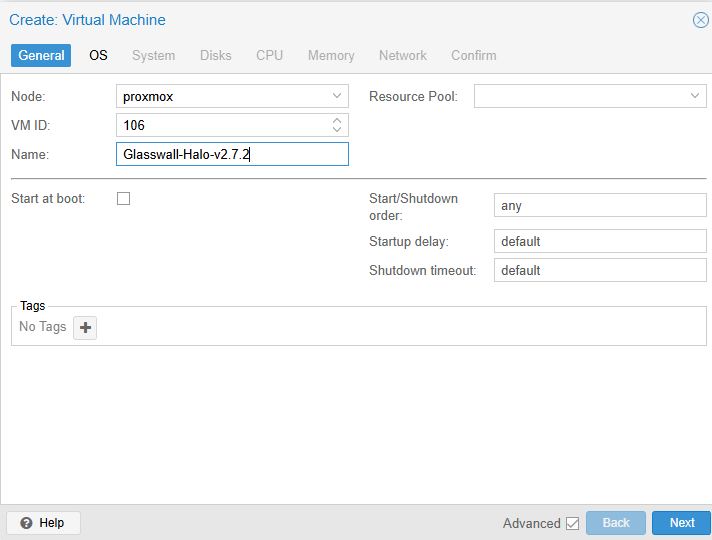
- General: Provide a VM name (e.g.,
Glasswall-Halo).
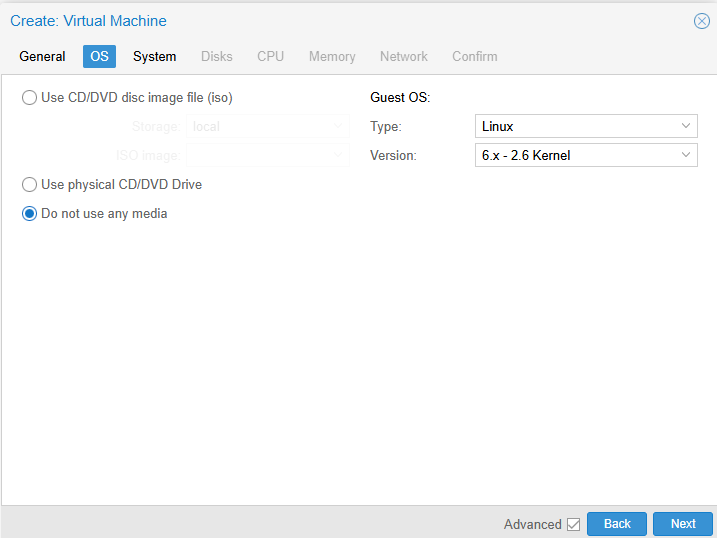
- OS: Select a generic Linux type (e.g.,
Linux 5.x/6.x). You do not need an ISO.
- System:
- BIOS: Set to SeaBIOS.
- SCSI Controller: VirtIO SCSI.
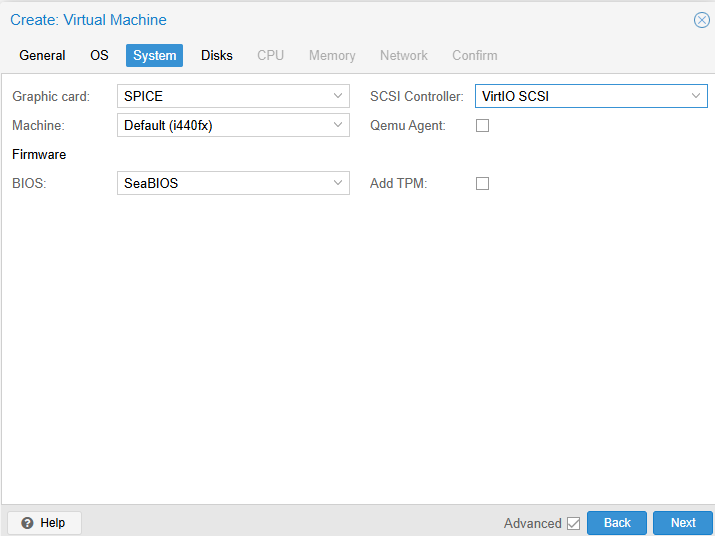
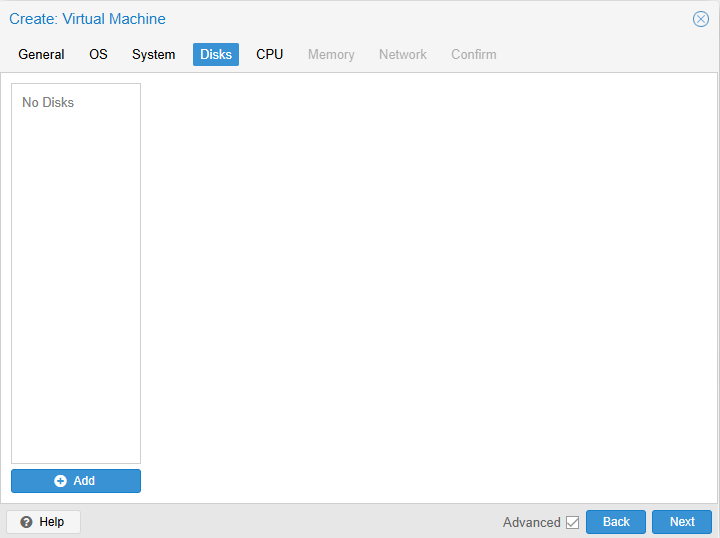
- Hard Disk: Remove the default disk (we’ll attach a converted disk later).
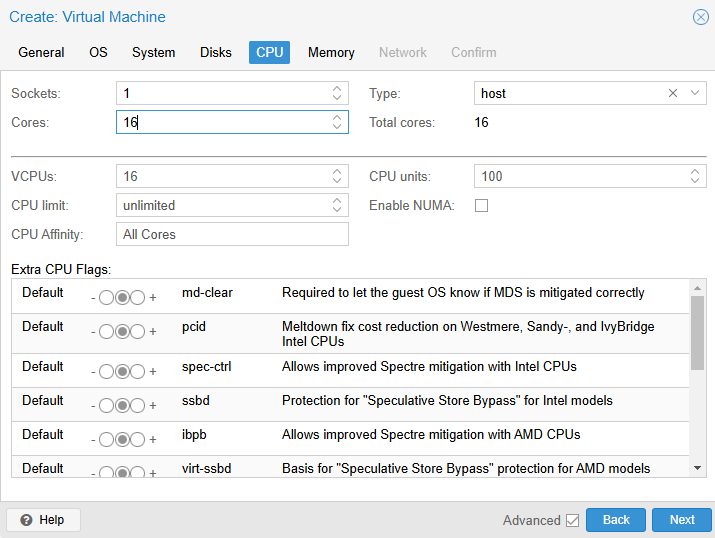
- CPU: Set type to
hostfor maximum performance; allocate at least 16 cores.
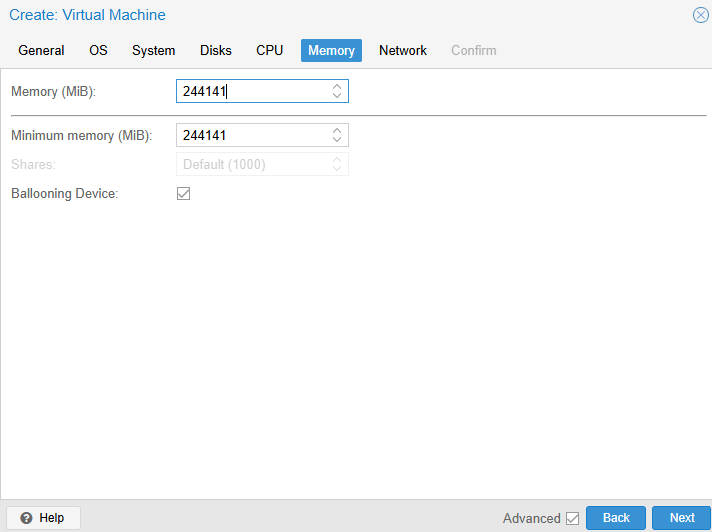
- Memory: Allocate 32–64 GB.
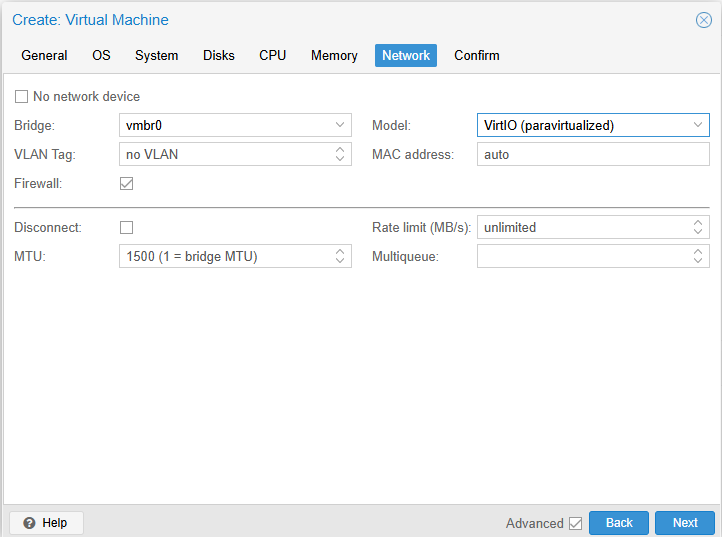
- Network: Attach a NIC to the desired bridge (e.g.,
vmbr0), typically VirtIO model.
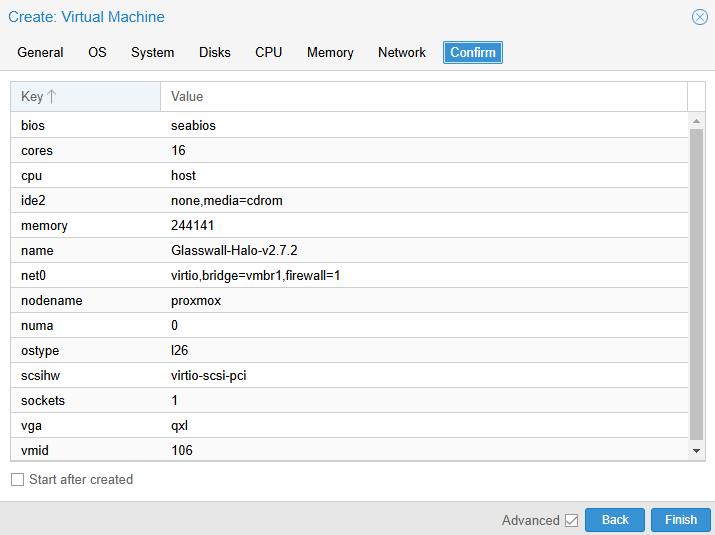
- Confirm the summary and finish. Note: do not start the VM yet.
Step 3 - Extract and Transfer the OVA
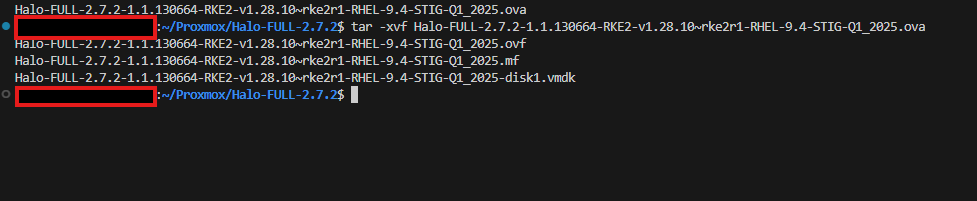
- Extract the OVA on your local system by running the following command:
tar -xvf Halo-FULL-<version>.ova
-
Identify the
.vmdkfile (e.g.,Halo-FULL-<version>-disk1.vmdk). -
Upload the
.vmdkto Proxmox, e.g.:scp Halo-FULL-...disk1.vmdk root@<Proxmox-IP>:/root/

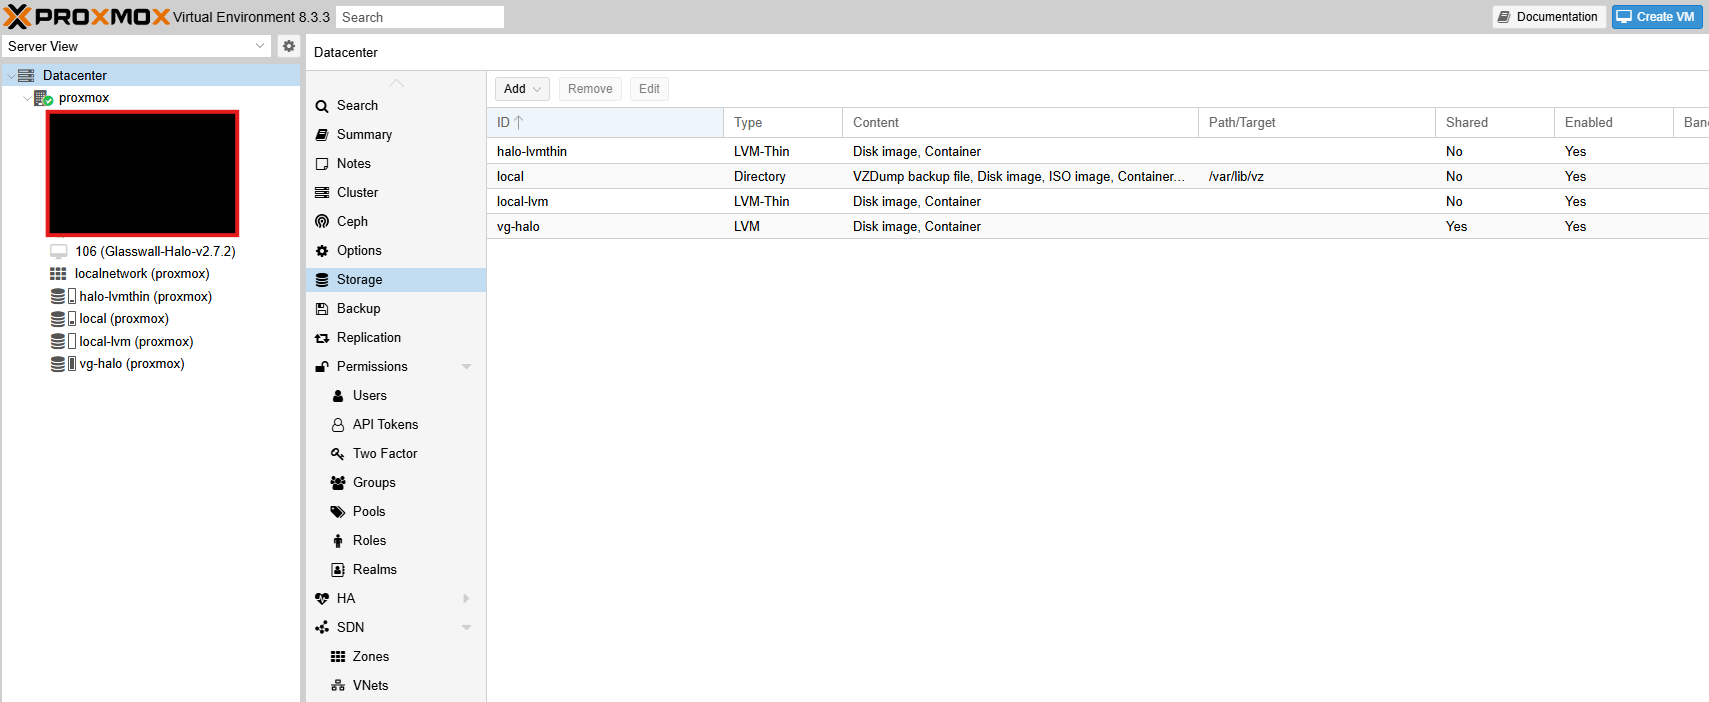
4. Prepare Storage (Optional LVM-Thin)
Why LVM-Thin? It provides thin provisioning and snapshot support, making it ideal for larger or frequently updated VM disks. However, you can also attach disks to directory-based or other storage types in Proxmox.
Example Steps to Create LVM-Thin:
# Identify a free disk, e.g. /dev/sdb
pvcreate /dev/sdb
vgcreate vg-halo /dev/sdb
# Create a thin pool consuming all space
lvcreate -l 100%FREE -T -n thin-halo vg-halo
After creating your thin pool, add it via Datacenter -> Storage -> Add -> LVM-Thin. Choose vg-halo as the volume group and thin-halo as the thin pool.
Step 5 - Convert and Attach the Halo Disk
Option A: qm importdisk
SSH into your Proxmox Host
If using storage that supports import (e.g., directory or LVM-Thin), run:
qm importdisk <VM_ID> /root/Halo-FULL-...disk1.vmdk <StorageName> --format qcow2
<VM_ID>is the ID assigned to your VM (e.g., 100).<StorageName>is the Proxmox storage target (e.g.,local-lvm,halo-lvmthin).- After completion, go to VM -> Hardware, find the “Unused Disk,” then Edit and select IDE0.
Option B (Recommended): Manual Conversion (qemu-img)
SSH into your Proxmox Host
If qm importdisk encounters errors (e.g., “zeroinit”), or if you prefer more direct management:
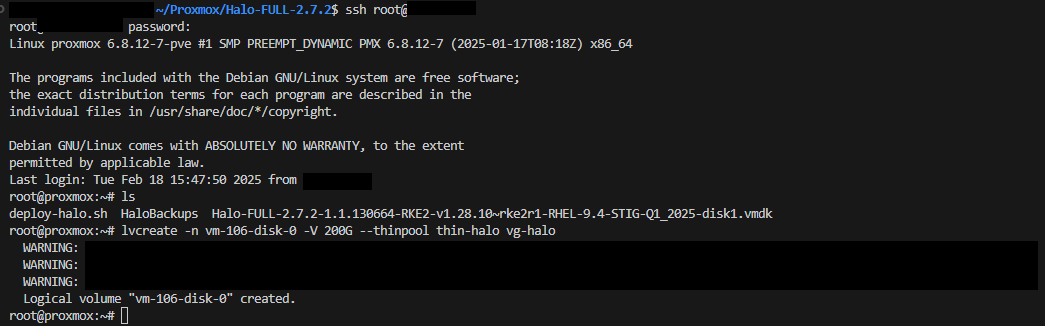
- Create a thin-provisioned volume for the Halo disk:
lvcreate -n vm-<VM_ID>-disk-0 -V 200G --thinpool thin-halo vg-halo - Convert the
.vmdkto a raw disk:qemu-img convert -f vmdk -O raw /root/Halo-FULL...disk1.vmdk /dev/vg-halo/vm-<VM_ID>-disk-0 - Attach disk to the VM:
qm set <VM_ID> --ide0 halo-lvmthin:vm-<VM_ID>-disk-0

Step 6 - Final VM Configuration
- In VM -> Hardware:
- IDE0 should be your main Halo disk.
- Confirm “VirtIO SCSI” is listed as the SCSI controller.
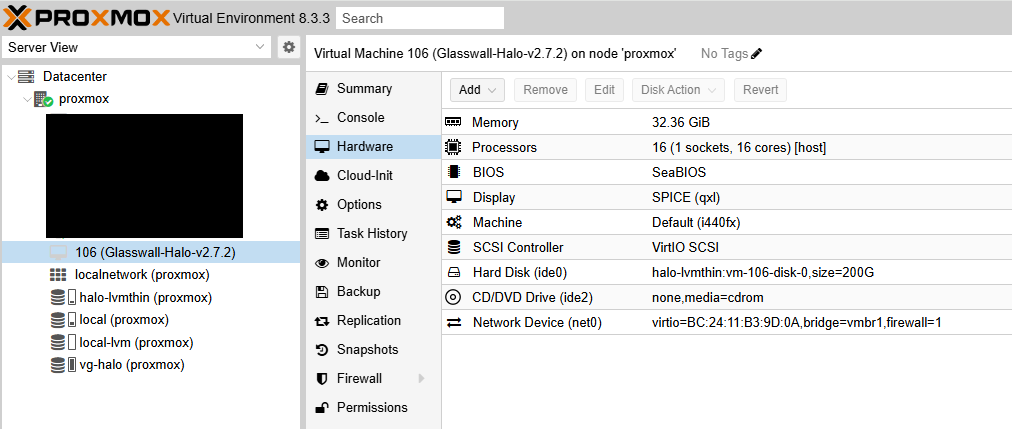
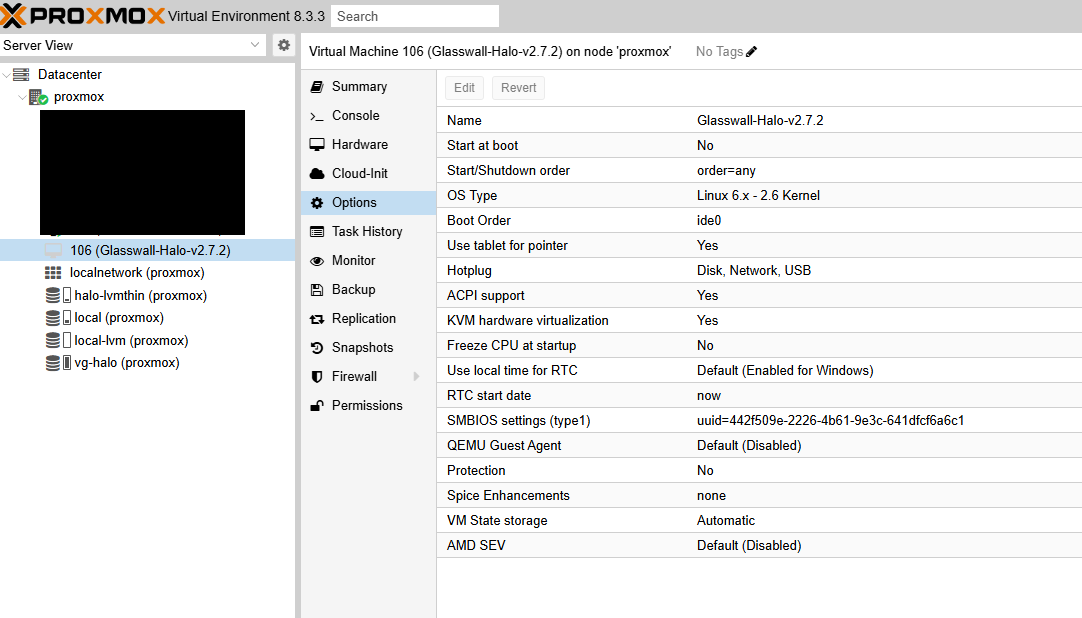
- In VM -> Options:
- Ensure Boot Order sets IDE0 as first.
- Verify BIOS is SeaBIOS.
- KVM hardware virtualization and ACPI should be enabled.
- Optional: QEMU Guest Agent can be installed inside the Halo VM for advanced functionality.
Step 7 - Initial Boot
- Start the VM in the Proxmox UI.
- Watch the console; it may take up to a minute to pass “Probing EDD…” on first boot.
- Configure network inside the Halo VM:
- For static IP: Edit RHEL’s
/etc/sysconfig/network-scripts/ifcfg-...or usenmcli. - For DHCP: Ensure your DHCP server is operational.
- For static IP: Edit RHEL’s
- Finalize application-level configurations (i.e. start_halo.sh, syslog server, TLS).
Deploying from a Glasswall Backup (.vma.zst)
If our Glasswall team has provided you with a pre-configured Proxmox backup, you can skip the OVA/VMDK steps.
Step 1 - Uploading and Restoring the Backup
- Copy the
.vma.zstbackup file to your Proxmox host’s backup directory:scp glasswall-halo-backup.vma.zst root@<Proxmox-IP>:/var/lib/vz/dump/ - In the Proxmox UI, go to Node -> Local -> Backup.
- Locate the
.vma.zstfile and select Restore. - Assign a new VM ID (e.g., 101) and target storage.
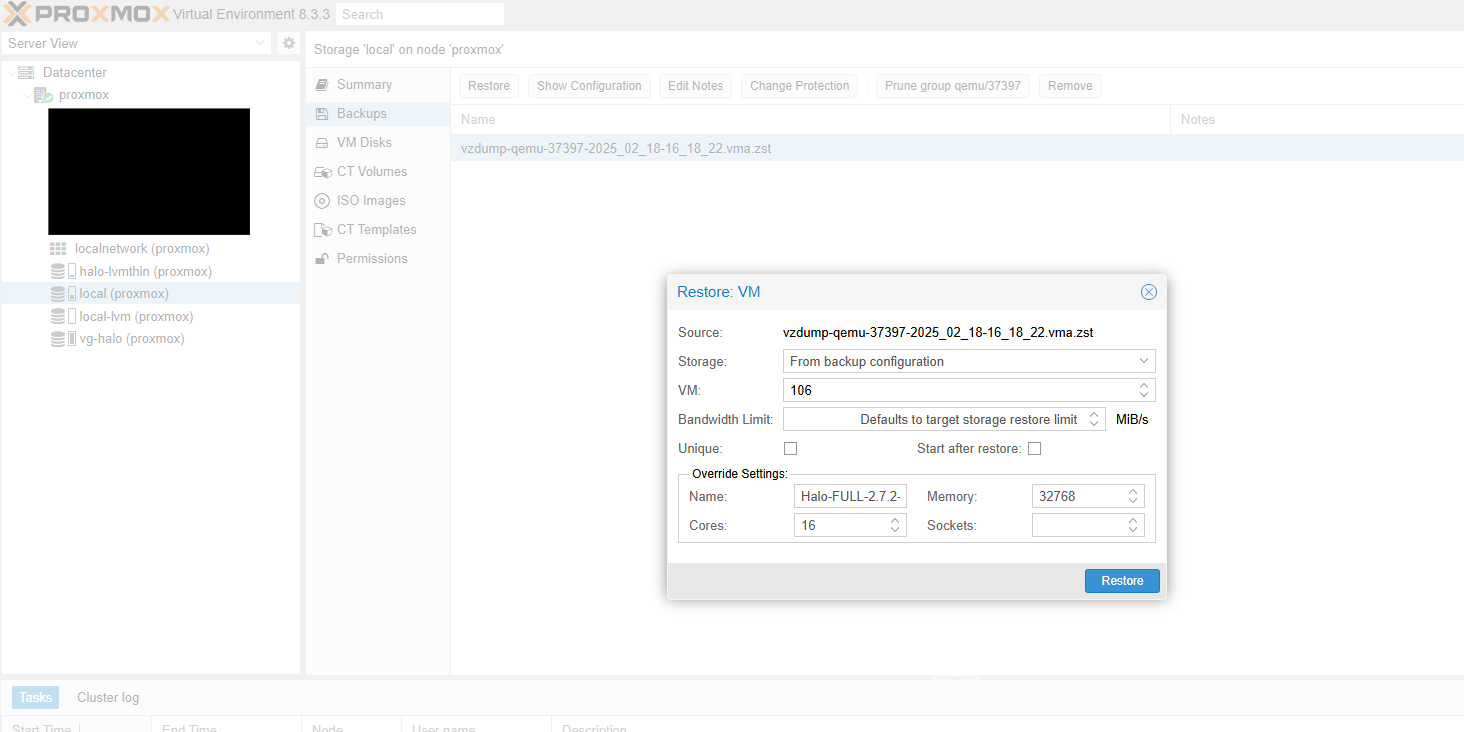
Step 2 - Verifying Disk Attachment
- After restore, open VM -> Hardware.
- Confirm that the main disk is attached to IDE0.
- Ensure BIOS is set to SeaBIOS under VM -> Options.
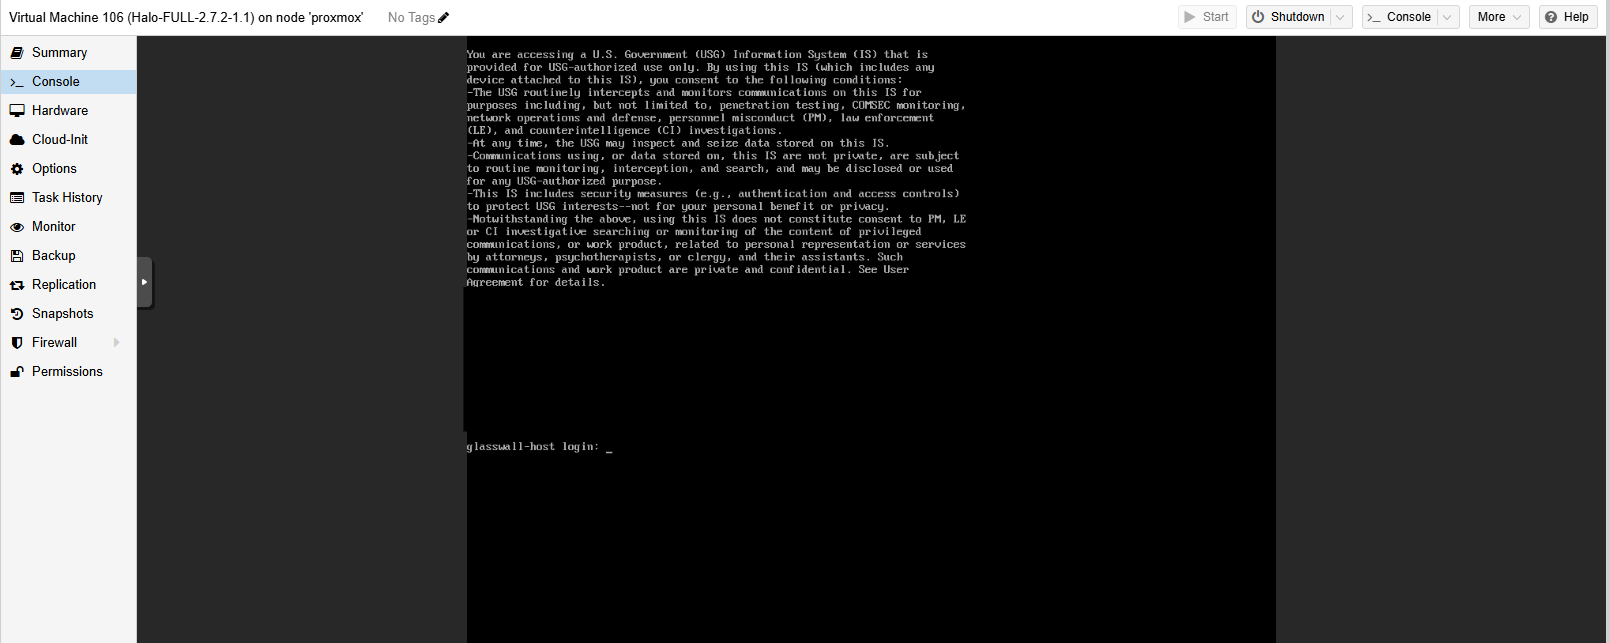
Step 3 - Starting the VM
- Power on the VM.
- Watch the console for any errors.
- Configure the network settings, if not already set.
- Proceed with any final configuration steps within Halo.
Troubleshooting and FAQs
zeroinit Error
This may occur when using qm importdisk with certain storage types or older QEMU versions. Solution: Use manual conversion with qemu-img.
Network Configuration Issues
- If the VM interface is named differently (e.g.,
ens18vs.eth0), adjust yourifcfg-files accordingly. - Use
nmcli device showorip ato confirm the interface name.
Why IDE + SeaBIOS?
- STIG-hardened RHEL images require Legacy BIOS for certain boot configurations.
- IDE ensures broad compatibility and avoids known issues with some virt drivers.
Additional Best Practices
- Snapshots: Leverage Proxmox snapshots or LVM-Thin snapshots for quick rollbacks.
- Backups: Regularly use
vzdumpto create compressed backups (.vma.zst). - Resource Monitoring: Keep an eye on CPU and memory usage for production loads.
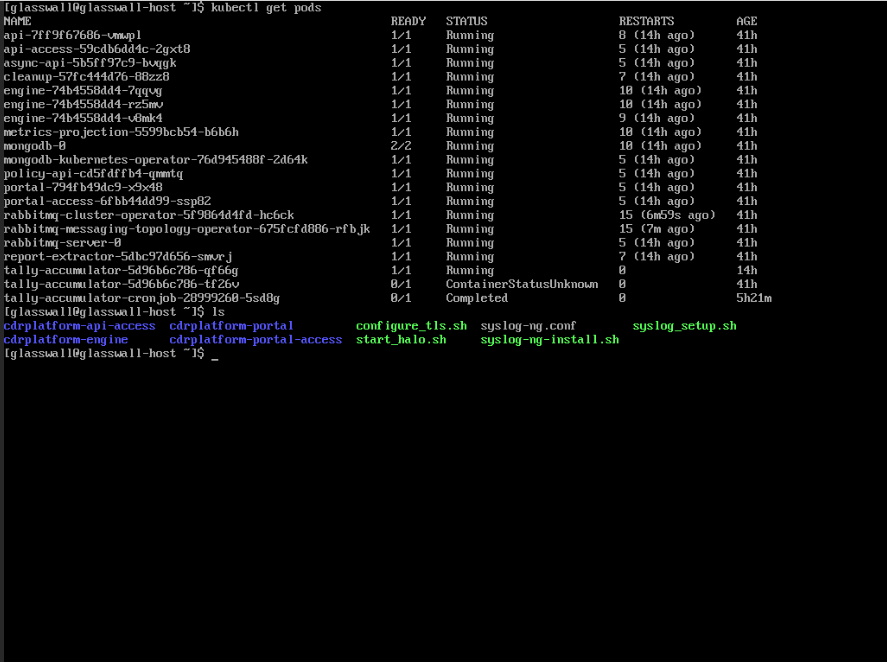
Initiate Glasswall Halo Services
- Execute the following command to launch Glasswall Halo:
bash start_halo.sh - Once the script has completed, confirm all the Glasswall Halo services and Pods are running using the following command:
kubectl get pods
Access Glasswall Portal
- Depending on your network configuration and/or domain configuration, you can now clean files by accessing the Glasswall Portal through the domain name and/or IP address assigned to your virtual machine.
Run the following command to confirm network status:
sudo netstat -tlnp