Glasswall Halo can be configured to enable Single Sign-On (SSO) with OpenID Connect (OIDC).
SSO is an authentication method that allows users to sign in using one set of credentials to multiple independent software systems. Using SSO means a user doesn't have to sign in to every application they use.
Below is the information on how to configure SSO within your Glasswall Halo solution using Microsoft Entra ID as the identity and access management (IAM) provider.
In principle, any IAM that offers OIDC may be configured to support SSO for Glasswall Halo.
Prerequisites for Microsoft Entra ID integration
- A Microsoft Enterprise Agreement for a Microsoft Entra ID account is required to enable this SSO option.
- A domain name must be configured for the Halo portal (Portal Service) to use SSO authentication.
- Azure App registrations are required whenever SSO authentication using Microsoft Entra ID needs to be enabled.
- There are three App registrations that need to be created:
cdrplatform-api-accesscdrplatform-portal-accesscdrplatform-portal-client
- The attached shell script helps to create these three app registrations. Enter the domain name you would like to use for the Portal as an argument to the shell script. For example, use halo.glasswall.com as the domain name and run the script:
bash create-azure-app-registrations.sh halo.glasswall.com
- The enterprise application
ar-halo-portal-clientneeds to be granted Admin consent.
Configuration
Enable Microsoft Entra ID API authentication
To enable Microsoft Entra ID based authentication, set configuration.AuthenticationScheme=Bearer. Also set tenant_id and domain_name variables while deploying the Helm chart.
Note: The URI for the app registration may vary depending on when it was created. Always copy the exact app registration URI from the Azure Portal and use it as the Valid Audience value.
tenant_id=""
portal_domain=""
valid_audiences="api://cdrplatform-api-access" or "api://${tenant_id}/cdrplatform-api-access" # (verify app registration URI from Azure)
helm upgrade --install cdrplatform-portal-access cdrplatform-portal-access \
 --set image.repository=glasswallhub.azurecr.io/cdrplatform-portal-access \
 --set image.tag=144773 \
 --set ingress.tls.enabled=true \
 --set ingress.tls.domain=${portal_domain} \
 --set ingress.tls.secretName=tls-secret \
 --set configuration.AuthenticationScheme=Bearer \
 --set configuration.Authentication__Schemes__Bearer__ValidAudiences__0=${valid_audiences} \
 --set configuration.Authentication__Schemes__Bearer__ValidIssuer=https://sts.windows.net/${tenant_id}/ \
 --set configuration.Authentication__Schemes__Bearer__Authority=https://login.microsoftonline.com/${tenant_id}/v2.0/ \
 --atomic
Configure SSO login for the Glasswall Halo portal
- Set
portal_domain,portal_client_id,tenant_idvariables in the commands below and run them. Theportal_domainis the domain name used to setup TLS for the portal service as well as the same domain used in the cdrplatform-portal-client app registration. portal_client_idis the Application (client) ID of thecdrplatform-portal-clientapp registration created in the prerequisites step.tenant_idis of the tenant where App registrations are created.enabled_pagesvariable should be set toSystemSettings\,PolicySettings\,ValidationSettingswhen Policy API is deployed, otherwise set it toenabled_pages="SystemSettings".
portal_domain=""
portal_client_id=""
tenant_id=""
enabled_pages="SystemSettings\,PolicySettings\,ValidationSettings"
helm upgrade --install cdrplatform-portal cdrplatform-portal \
  --set image.repository=glasswallhub.azurecr.io/cdrplatform-portal \
  --set image.tag=141353 \
  --set ingress.tls.enabled=true \
  --set ingress.tls.domain=${portal_domain} \
  --set ingress.tls.secretName=tls-secret \
  --set configuration.BackendUrl="https://${portal_domain}" \
  --set configuration.EnabledPages=${enabled_pages} \
  --set configuration.OIDC.ProviderOptions.Authority="https://login.microsoftonline.com/${tenant_id}/v2.0" \
  --set configuration.OIDC.ProviderOptions.RedirectUri="https://${portal_domain}/authentication/login-callback" \
  --set configuration.OIDC.ProviderOptions.ClientId="${portal_client_id}" \
  --set configuration.OIDC.ProviderOptions.PostLogoutRedirectUri="https://${portal_domain}/authentication/logout-callback" \
  --atomic
Next, the Portal Access service needs to enable SSO authentication using Microsoft Entra ID.
-
Set
tenant_idandportal_domainvariables in the commands below and run them.Note: The URI for the app registration may vary depending on when it was created. Always copy the exact app registration URI from the Azure Portal and use it as the Valid Audience value.
tenant_id=""
portal_domain=""
helm upgrade --install cdrplatform-portal-access cdrplatform-portal-access \
 --set image.repository=glasswallhub.azurecr.io/cdrplatform-portal-access \
 --set image.tag=140258 \
 --set ingress.tls.enabled=true \
 --set ingress.tls.domain=${portal_domain} \
 --set ingress.tls.secretName=tls-secret \
 --set configuration.AuthenticationScheme=Bearer \
 --set configuration.Authentication__Schemes__Bearer__ValidAudiences__0=api://cdrplatform-portal-access \
 --set configuration.Authentication__Schemes__Bearer__ValidIssuer=https://sts.windows.net/${tenant_id}/ \
 --set configuration.Authentication__Schemes__Bearer__Authority=https://login.microsoftonline.com/${tenant_id}/v2.0/ \
 --atomic
Learn more via Microsoft Application Management Documentation
User roles
To assign roles to Portal users:
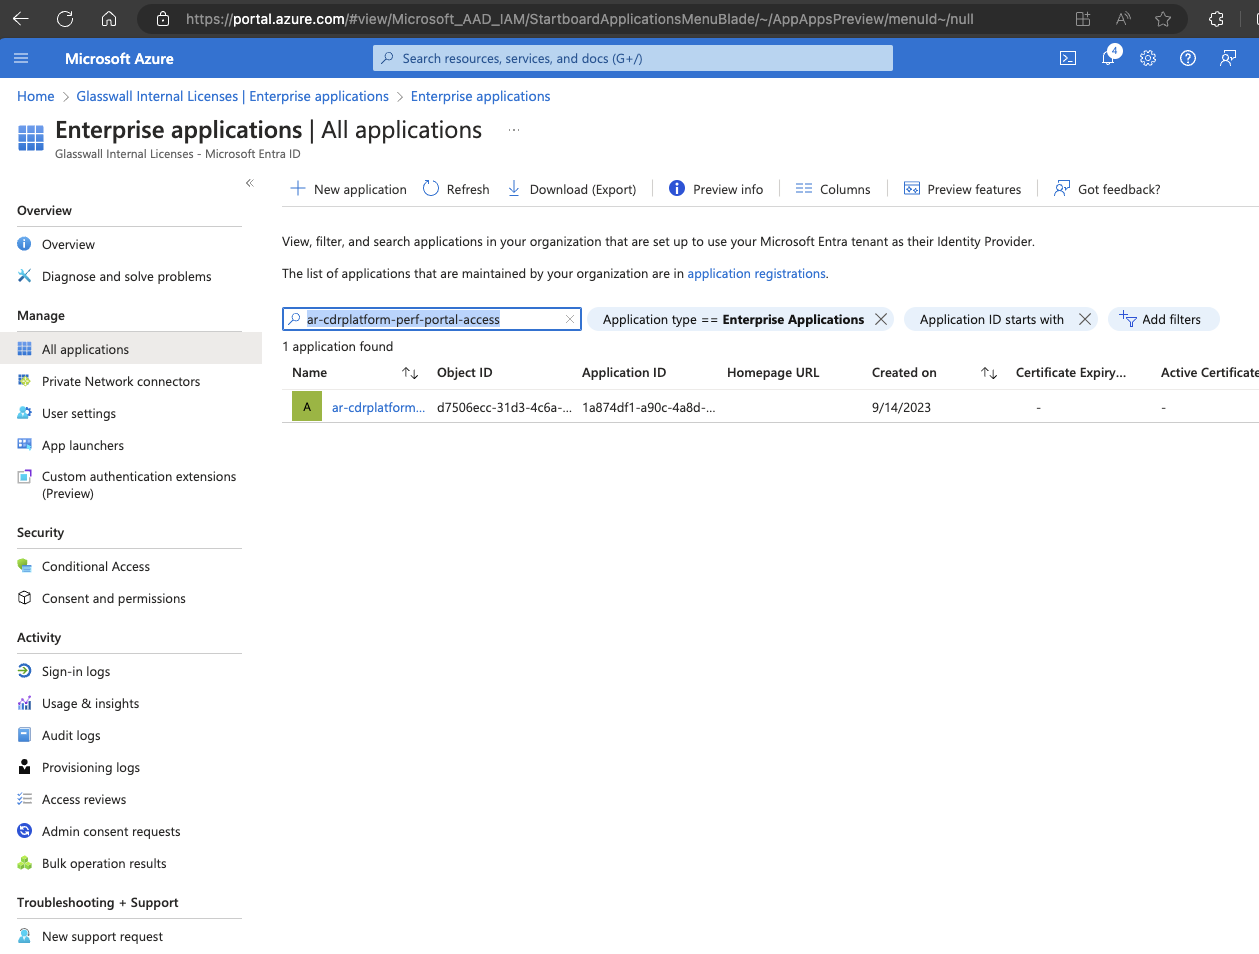
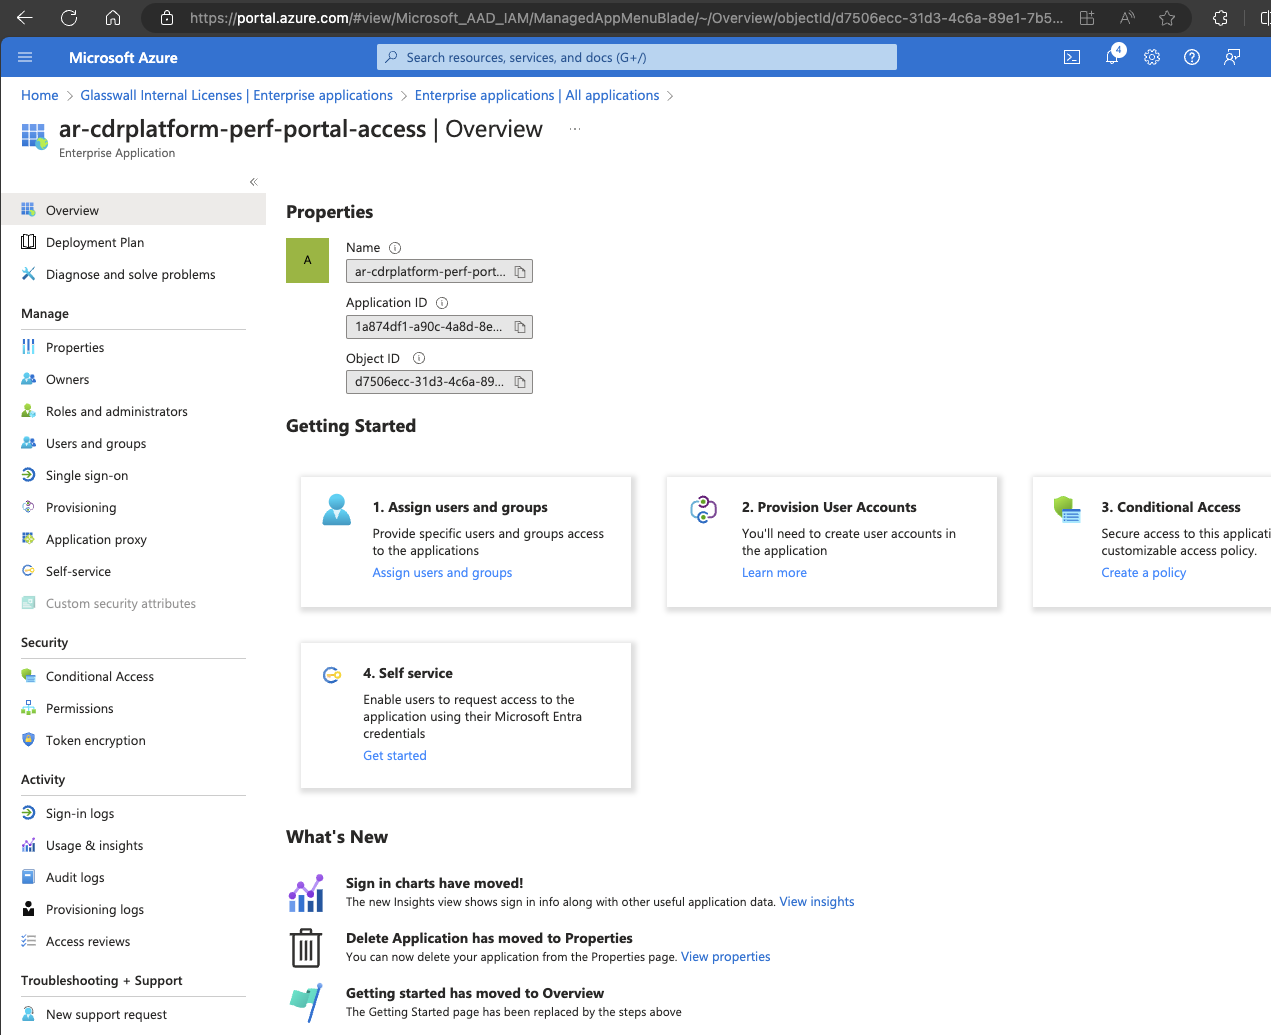
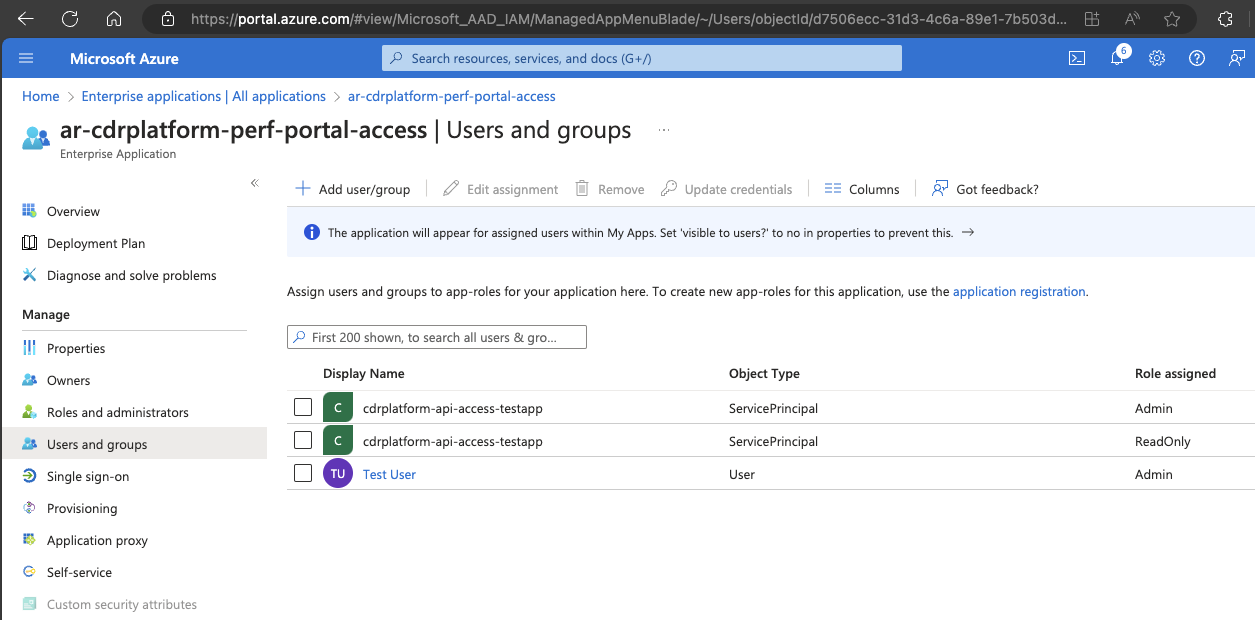
- Navigate to the Enterprise Application titled
ar-cdrplatform-portal-accesswithin Microsoft Entra ID.
Note: the screenshots use ar-cdrplatform-perf-portal-access as an example.
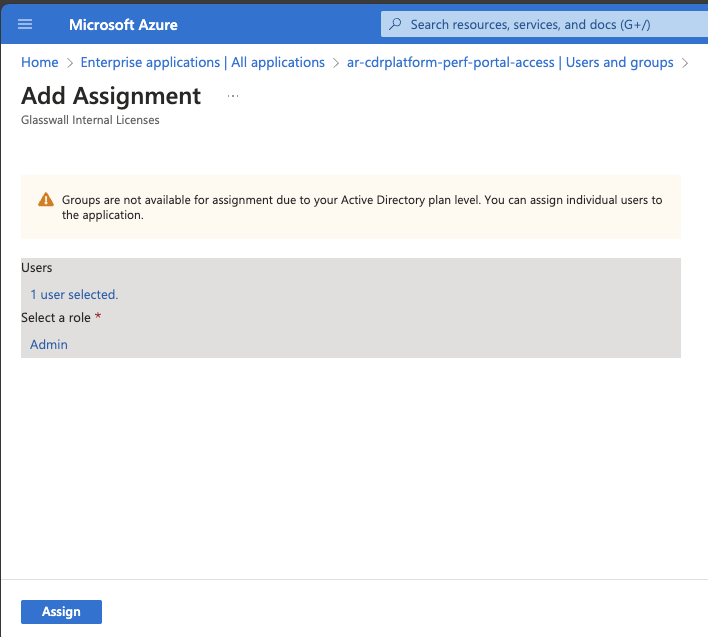
- Navigate to the Users and groups section and select Add user/group.
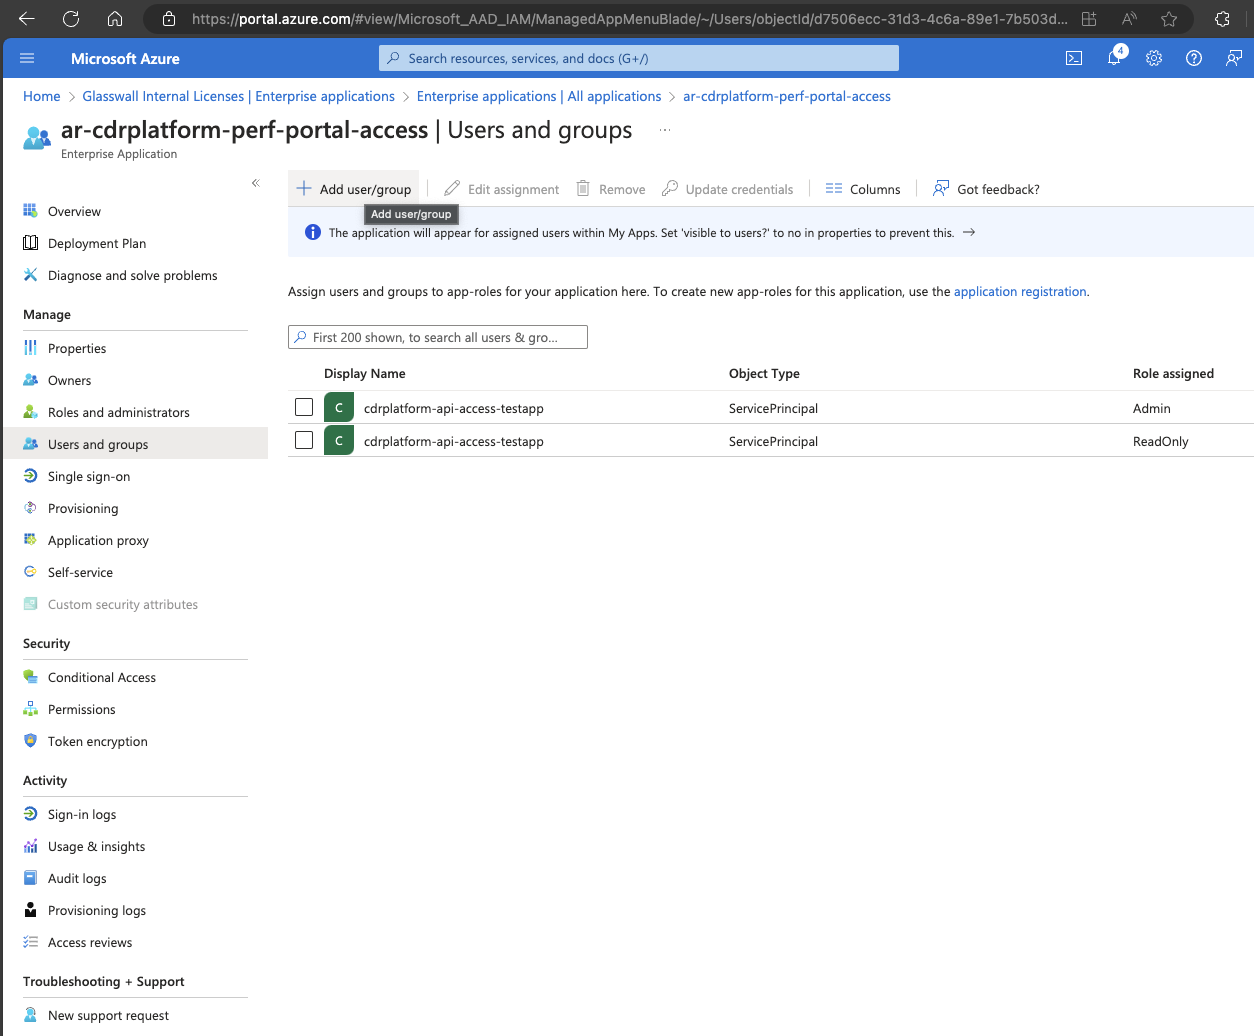
- Select the desired user or group, then select the suitable role.

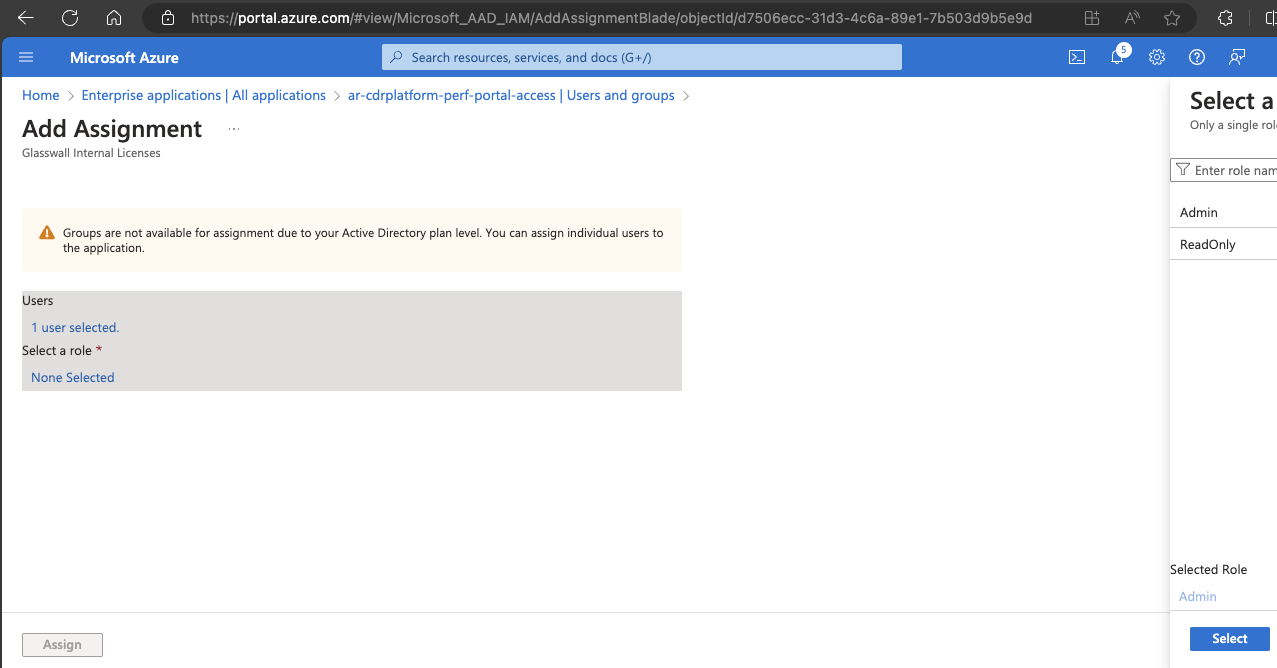
- Click Assign.
To assign roles to API users:
- Navigate to the Enterprise Application titled
ar-cdrplatform-api-accessin Microsoft Entra ID. - From the Users and groups section, click Add user/group.
- Select the desired user or group from the list, then select the suitable role.
- Click Assign.